David Hockney Inspired
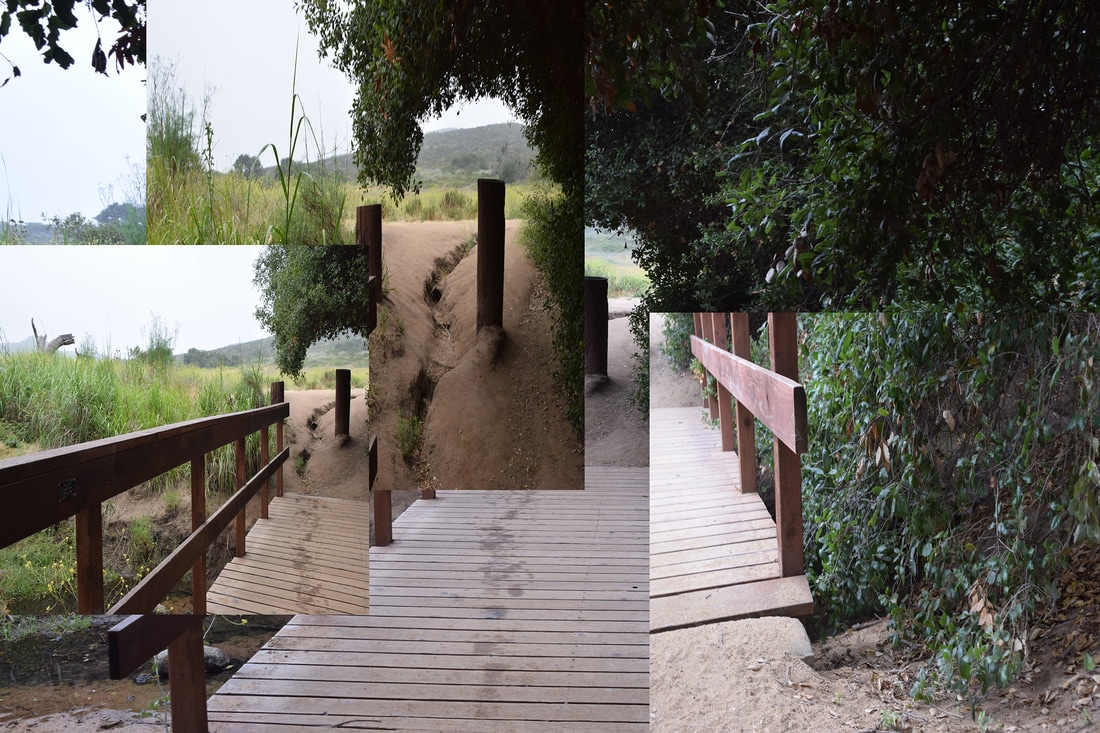
David Hockney is an english painter, draughtsman, printmaker, stage designer, and photographer. he was born July 9th, 1937 (age 79), Braford, United Kingdom. He's known for his photo collages and paintings of Los Angeles, he's one of the most known british artist in the 20th century. I think my pictures emulates his style because he takes pictures of an area, and different parts of the same area and collages them together so everything in the one picture can be seen in one. You also get different colors in the pictures, depending on where you take them and what areas you collage together. What I did to create these photographs, was I created a new folder by clicking file on the top and then i drag my first picture. Then i dragged my second picture and sized it to the right size, then pressing the okay arrow on the top. I do that for the rest of the pictures and when I'm done, i size it to 8" wide in photoshop and save it as a JPG.

Magazine Cover
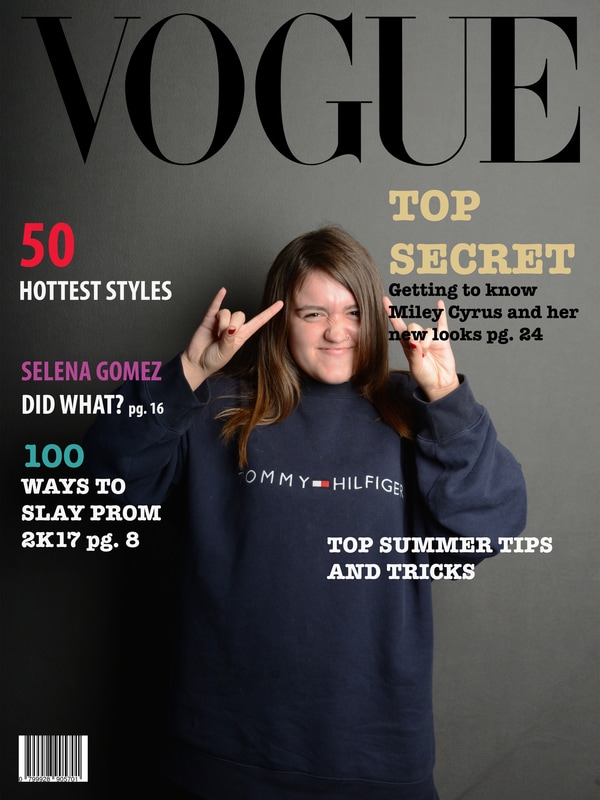
I chose this magazine cover because since I'm wearing a Tommy Hilfigure sweater and i chose Vogue because it is known for being high in fashion and as some people know Tommy is a very expensive brand. I like how myself came out because I'm usually not very photogenic and i don't think it came out that horrible. Also the headlines i believe came out very well. What i did to emulate the style by looking up the logo for Vogue and i looked up covers of different Vogue covers and tried to copy the style in a way. The font was whatever the regular one was on, i can't remember it and i used a bright red, a purple isn, teal and a mustard yellow, also black. The set up was my teacher had a blanket looking grey backdrop that is around $150 dollars i believe and it's like connected to black poles to have it go higher up to have you have a good background. The way i created the photograph was, there was a paper of different poses to do and i felt very awkward because i was standing in the only light of a dark room while everyone was doing their work on their computers. But i decided to have a little fun and do a rock and roll pose for a fashion magazine. A strobe light is used for flashes of light, and its connected to the camera so when you take a picture, the strobe light would flash for the picture. The purpose of a molding light is to allow a photographer to visually a sense of the lighting effect the flash, when it fires, will create. A soft box is a light that defines the light so its not harsh lighting but the picture isn't completely dark. You would use this if you're in a dark light, like where i was in and it makes your face give a little light. A reflector is used to balance natural light and whatever color your reflector is. A grey card is a middle grey card reference, typically used together with a reflective light meter, as a way to produce consistent image exposure and/or color in film and photography A grey card is a flat object of a neutral grey card color that derives from a flat reflectance spectrum A small radio trigger normally mounted on the camera hot shoe. A small reliever unit is also mounted on the off camera flash. The radio trigger saves having the camera and flash connected by camera wires.
Family
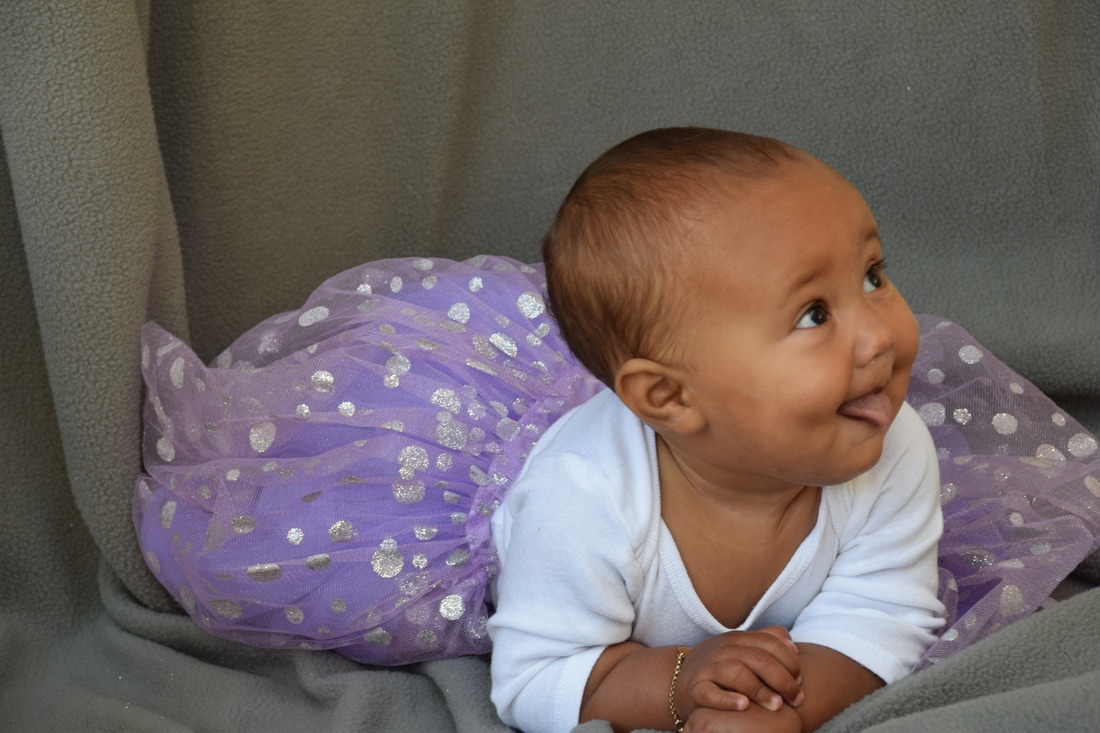
ISO 400 aperture f/8 shutter speed 1/60

ISO 400 aperture f/8 shutter speed 1/90
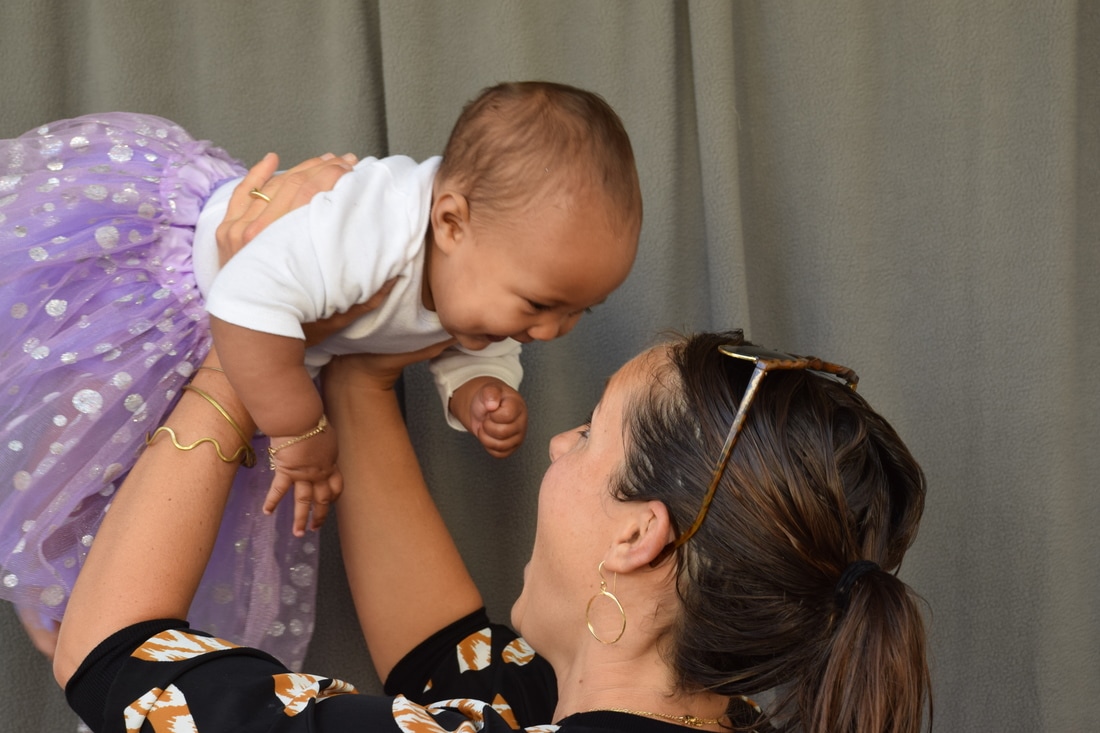
ISO 400 aperture f/8 shutter speed 1/60
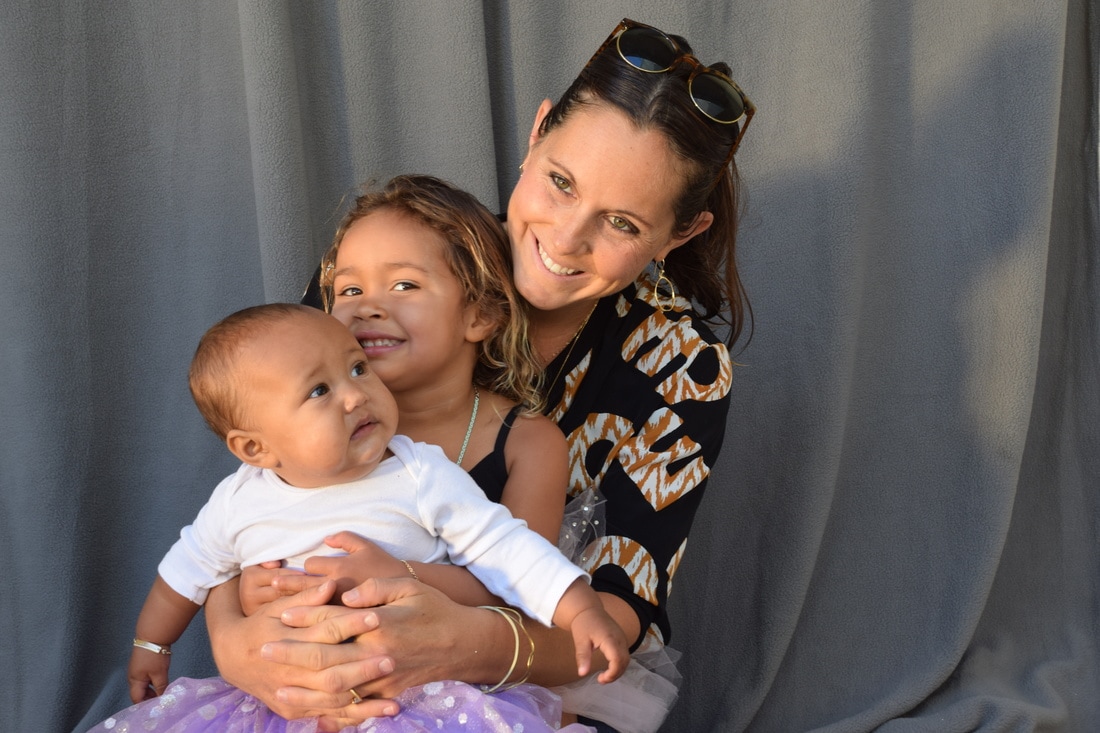
ISO 400 aperture f/8 shutter speed 1/90
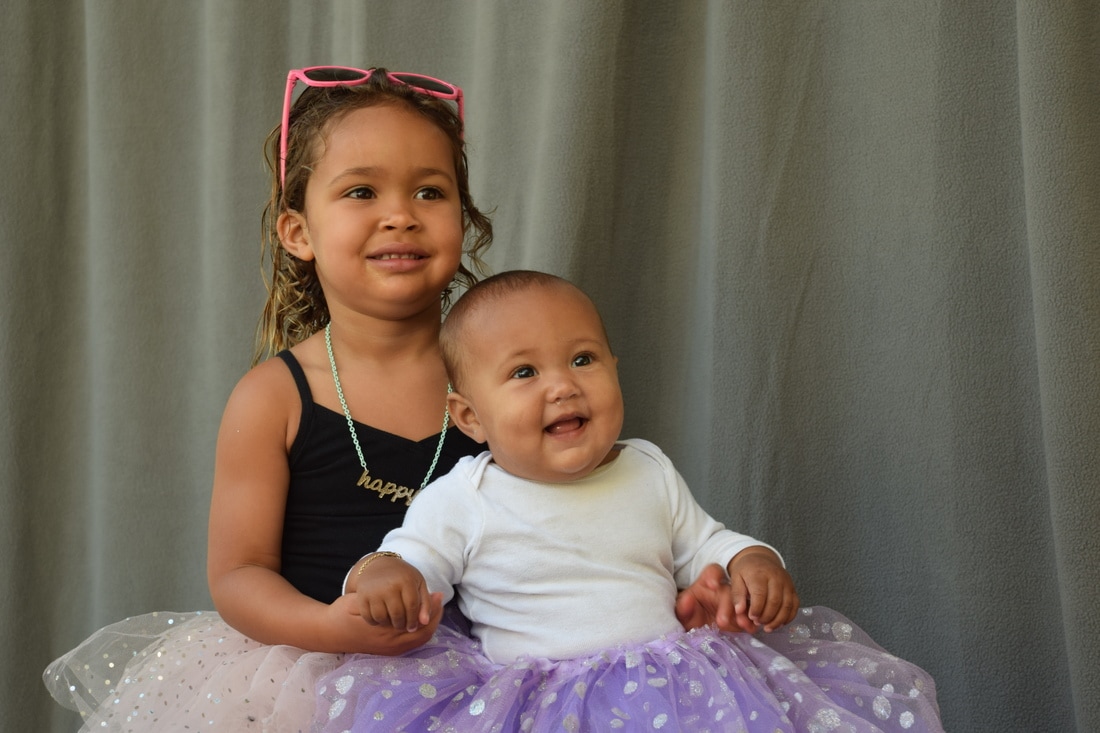
ISO 400 aperture f/8 shutter speed 1/90

ISO 400 aperture f/8 shutter speed 1/60
Del Mar Fair
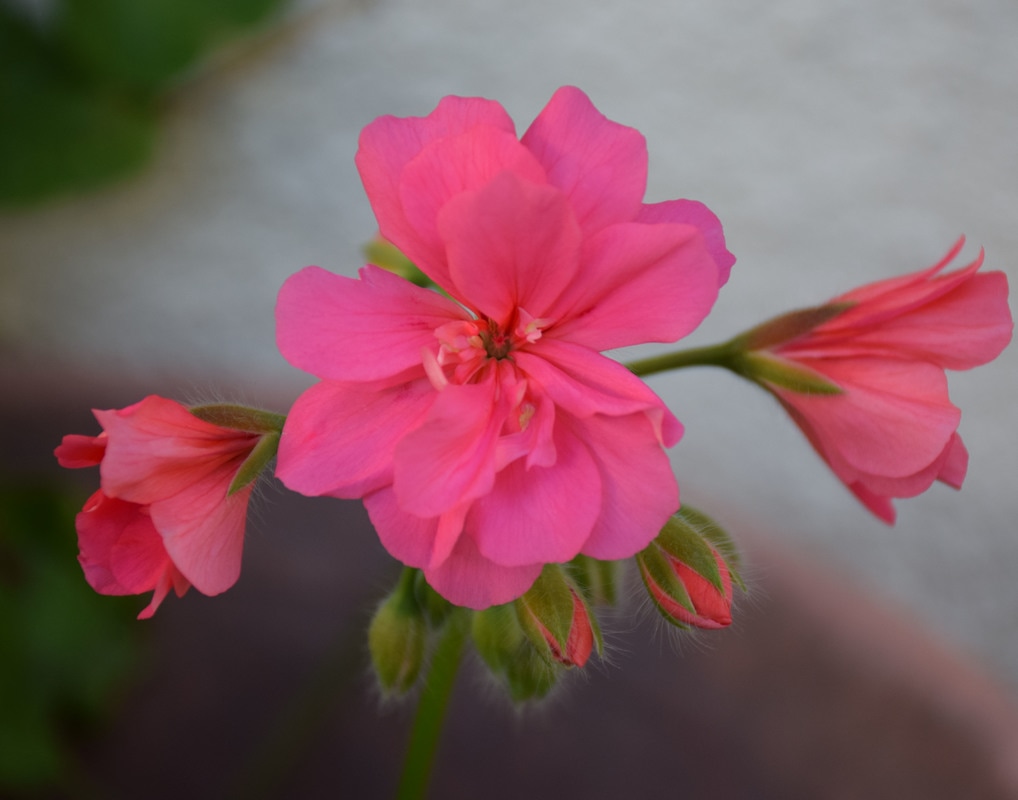
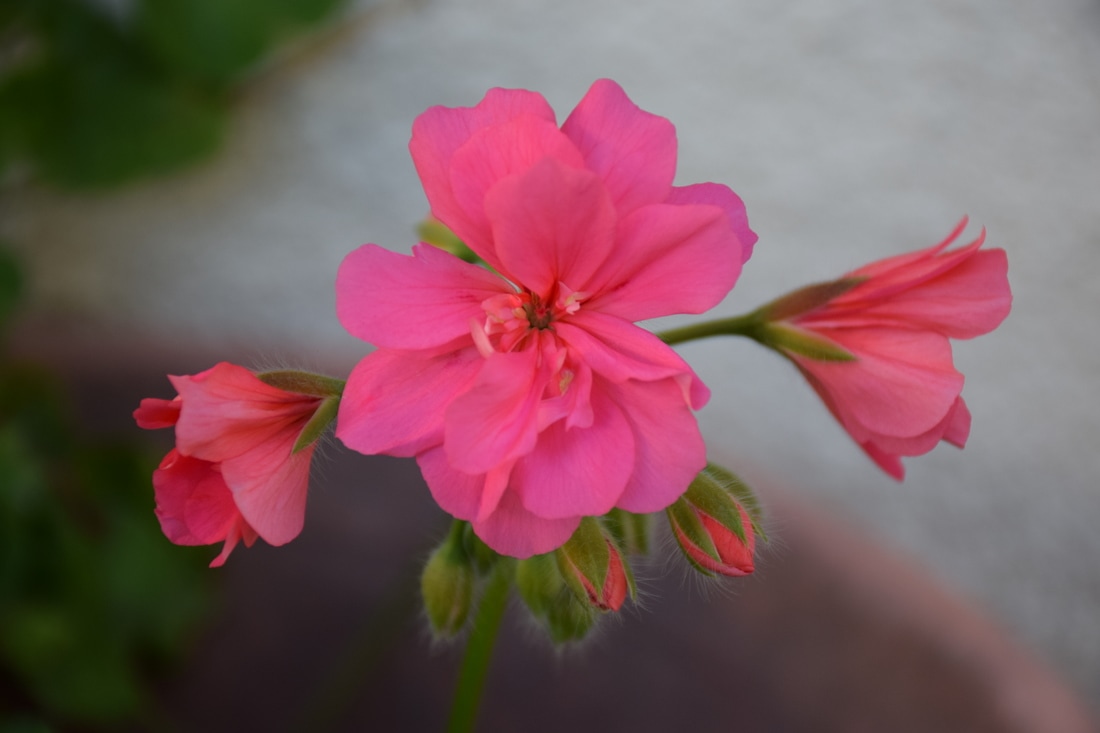
Flower Power
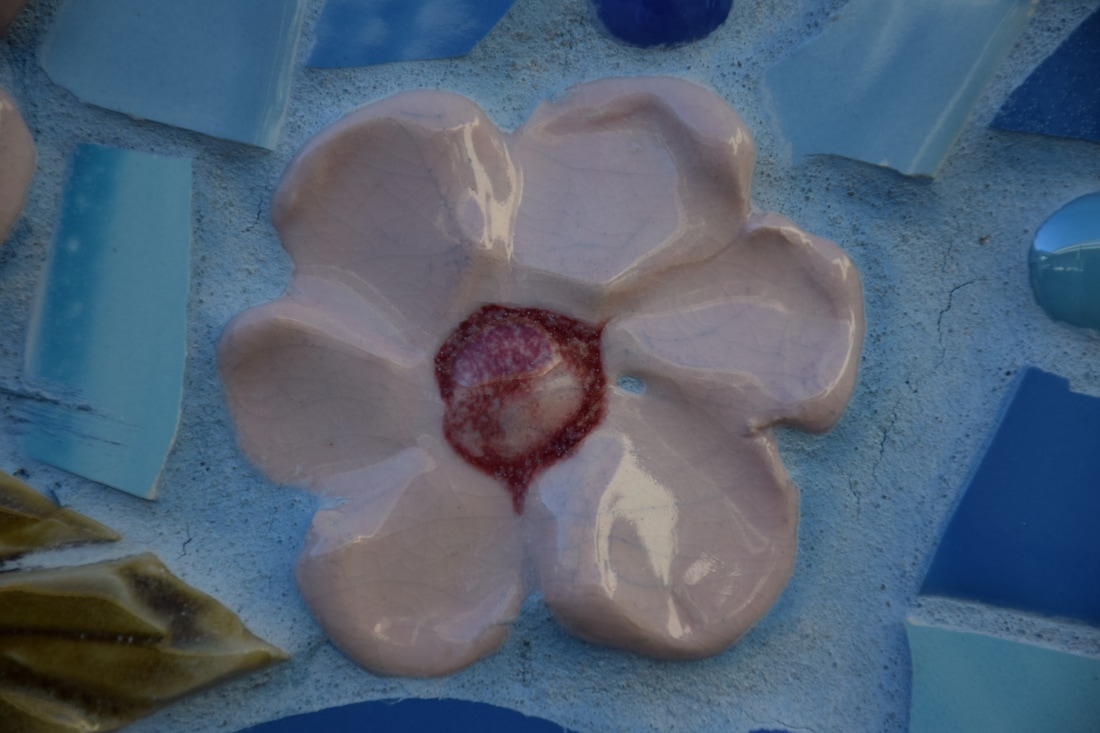
This image was taken at my school outside of our weight room by some tables. The compositional rule is color because the flower is obviously the main viewpoint with its pop of pink being the main focus. The type of camera that was used was a Nikon D5300 with a 18- 140mm lens. I didn’t change anything about it in Adobe Photoshop. I simply took the picture hoping for the best. I didn’t change anything in iPhoto either, no blur effects, no extra lighting, no nothing. My picture is in the division category of color photography because the flower just has that gorgeous, eye catching pink color, and having it come out so clear, makes it even more pleasing to the eye. Having the flower come out so stunning and the background blurred out, is nothing what I was expecting for. The printed on Epson Glossy Photo on the Epson P800 digital printer.
This image was taken at my school outside of our weight room by some tables. The compositional rule is color because the flower is obviously the main viewpoint with its pop of pink being the main focus. The type of camera that was used was a Nikon D5300 with a 18- 140mm lens. I didn’t change anything about it in Adobe Photoshop. I simply took the picture hoping for the best. I didn’t change anything in iPhoto either, no blur effects, no extra lighting, no nothing. My picture is in the division category of color photography because the flower just has that gorgeous, eye catching pink color, and having it come out so clear, makes it even more pleasing to the eye. Having the flower come out so stunning and the background blurred out, is nothing what I was expecting for. The printed on Epson Glossy Photo on the Epson P800 digital printer.
Light Room
Sports Photography
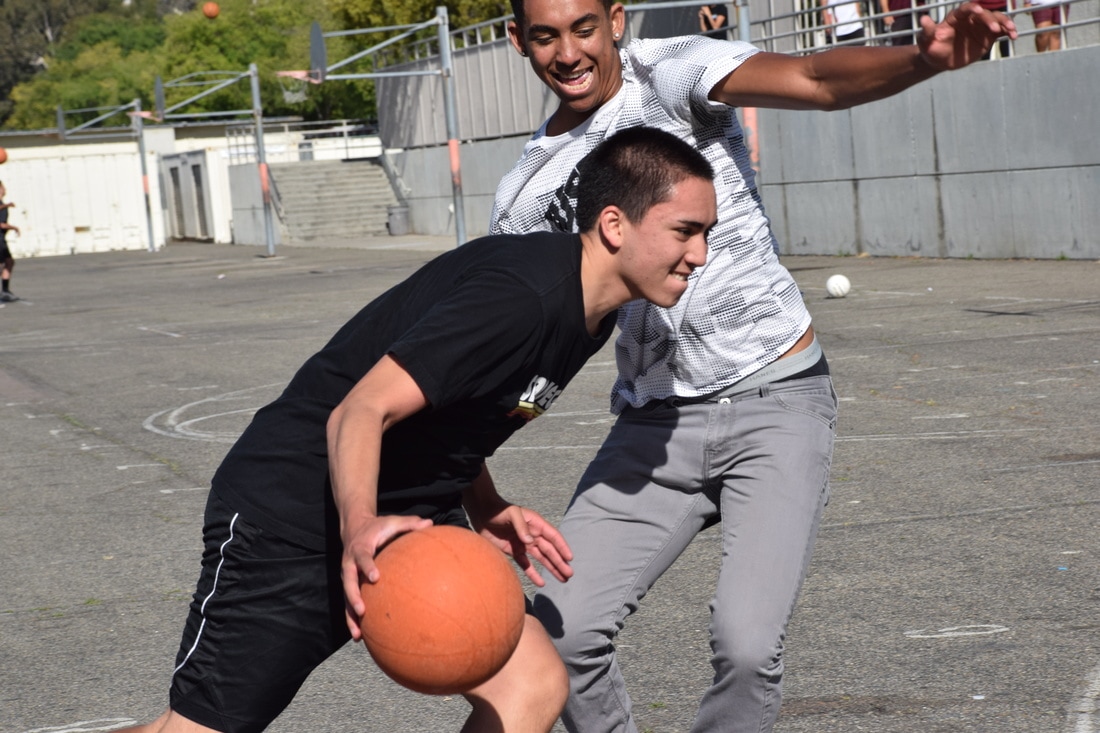
ISO 400 aperture f/11 shutter speed 1/1000 - setting is shutter priority

ISO 400 aperture f/9.5 shutter speed 1/1000 - setting is shutter priority
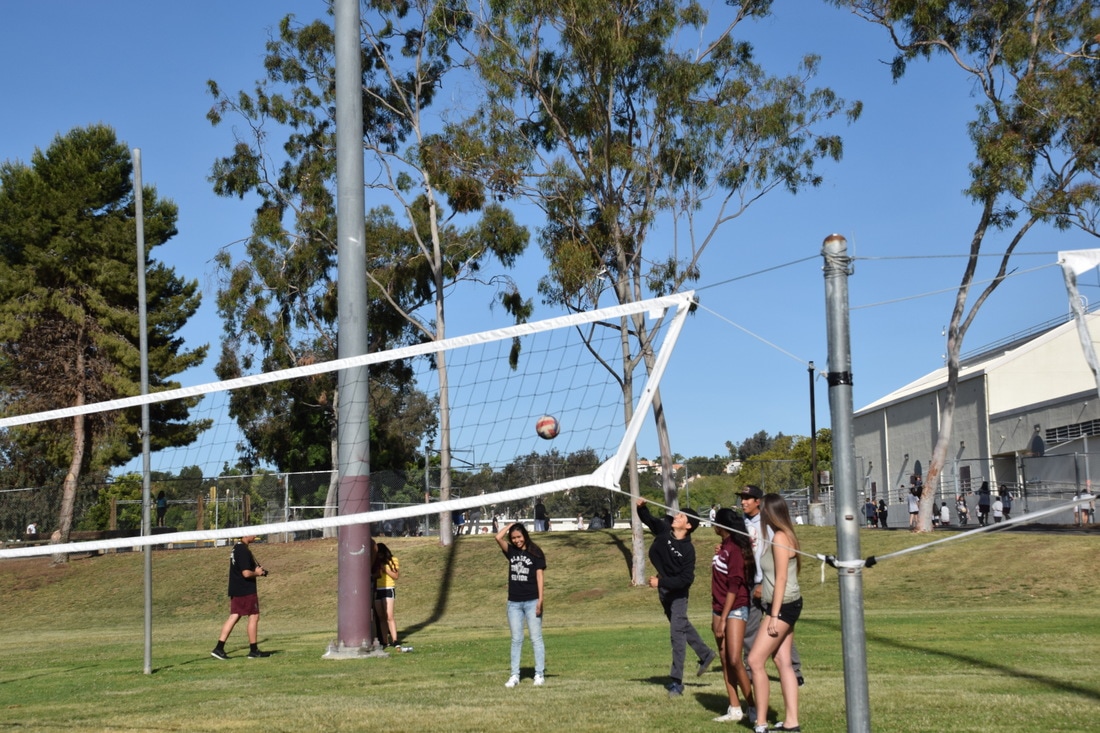
ISO 400 aperture f/11 shutter speed 1/1000 - setting is shutter priority
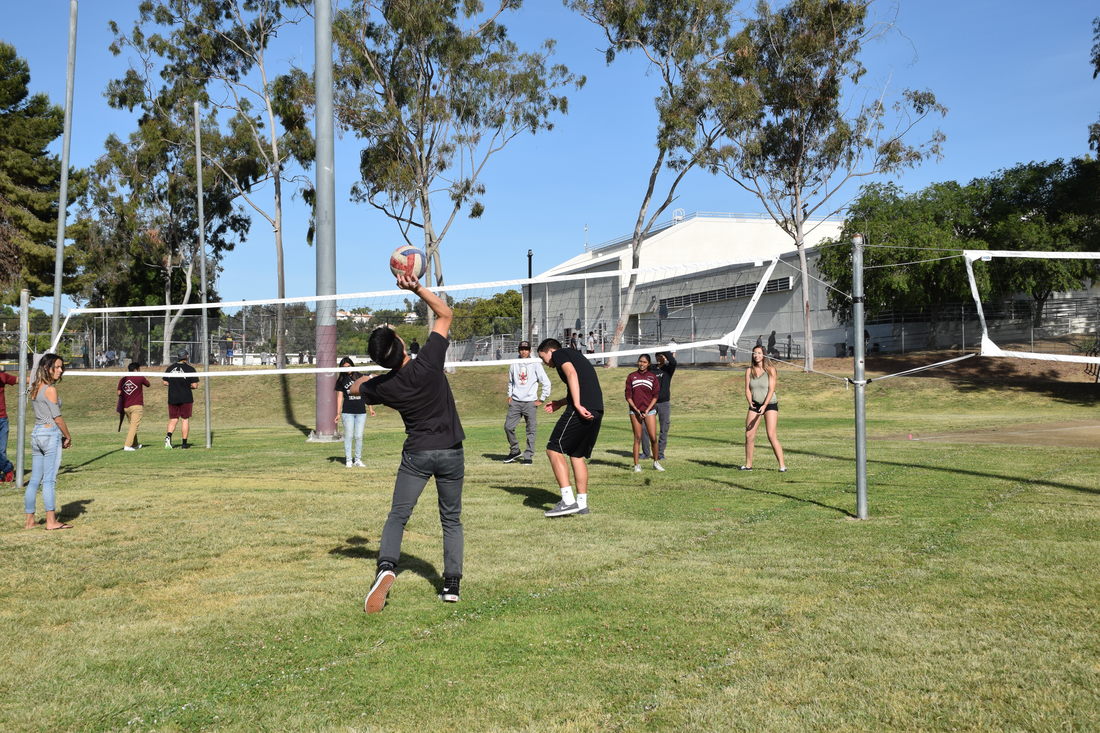
ISO 400 aperture f/9.5 shutter speed 1/1000 - setting is shutter priority
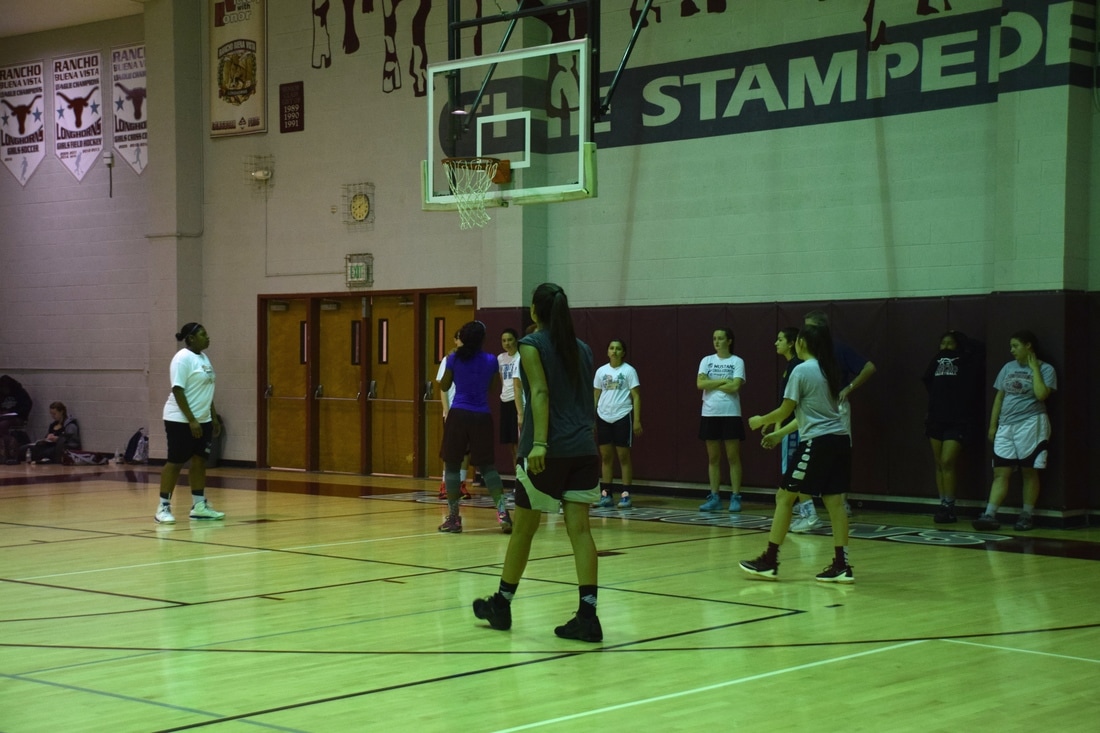
ISO 1600 aperture f/4.6 shutter speed 1/125 - setting is shutter priority
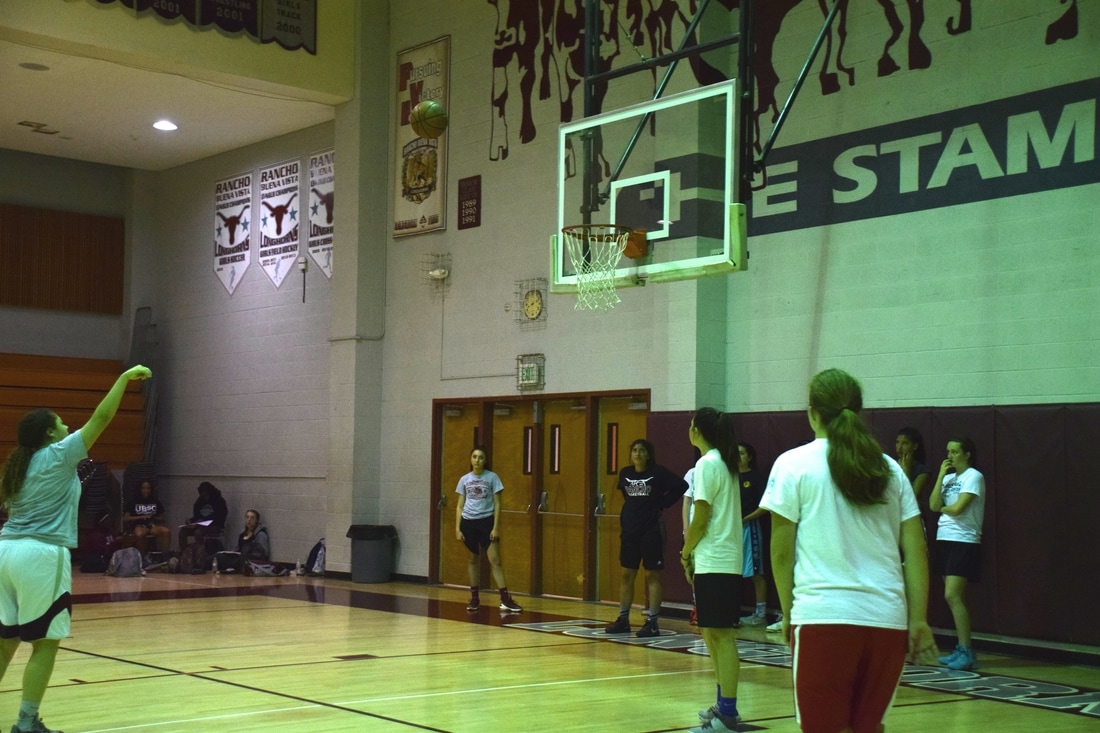
ISO 2000 aperture f/4.2 shutter speed 1/250 - setting is shutter priority
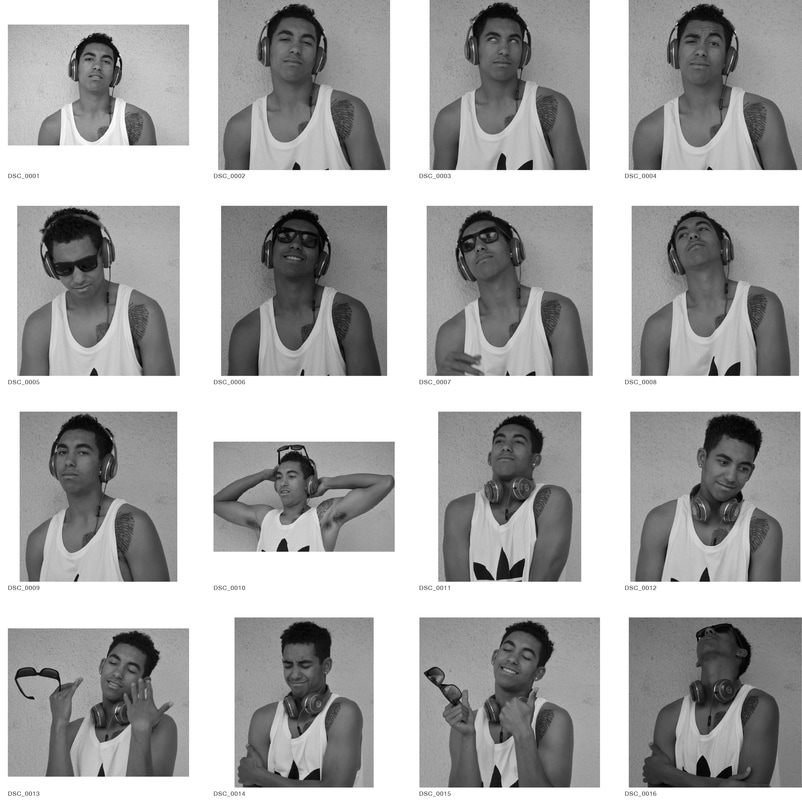
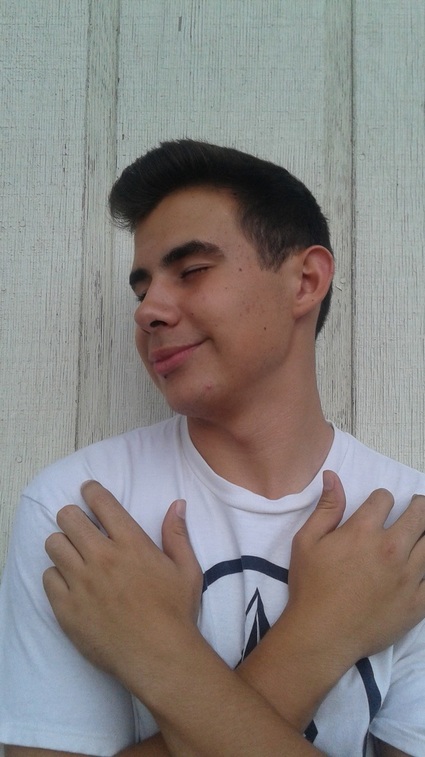
Expression Portraits
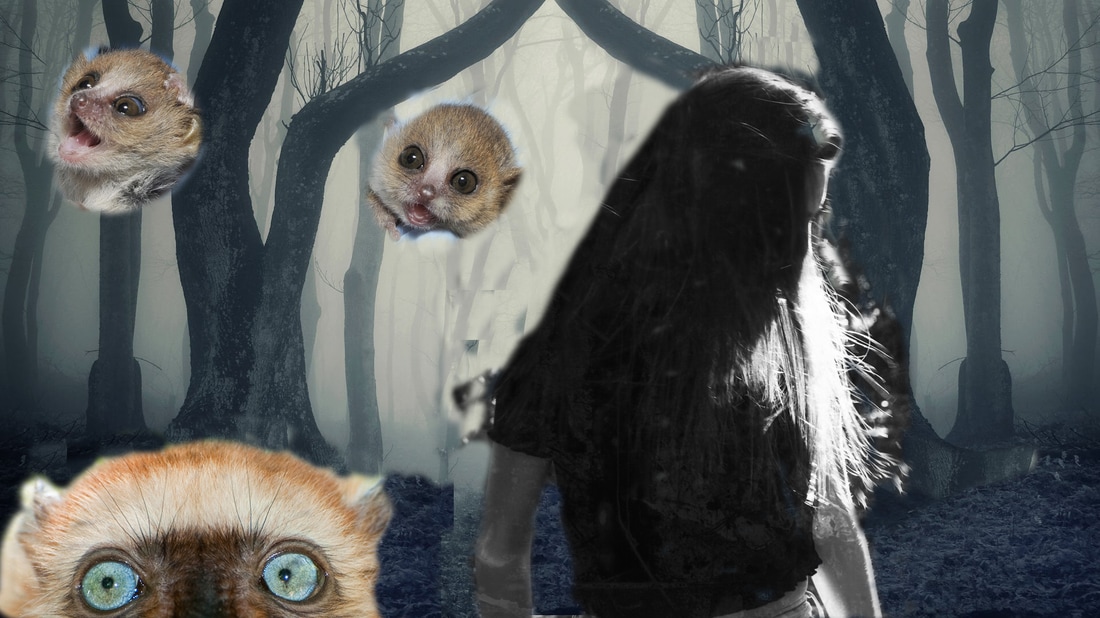
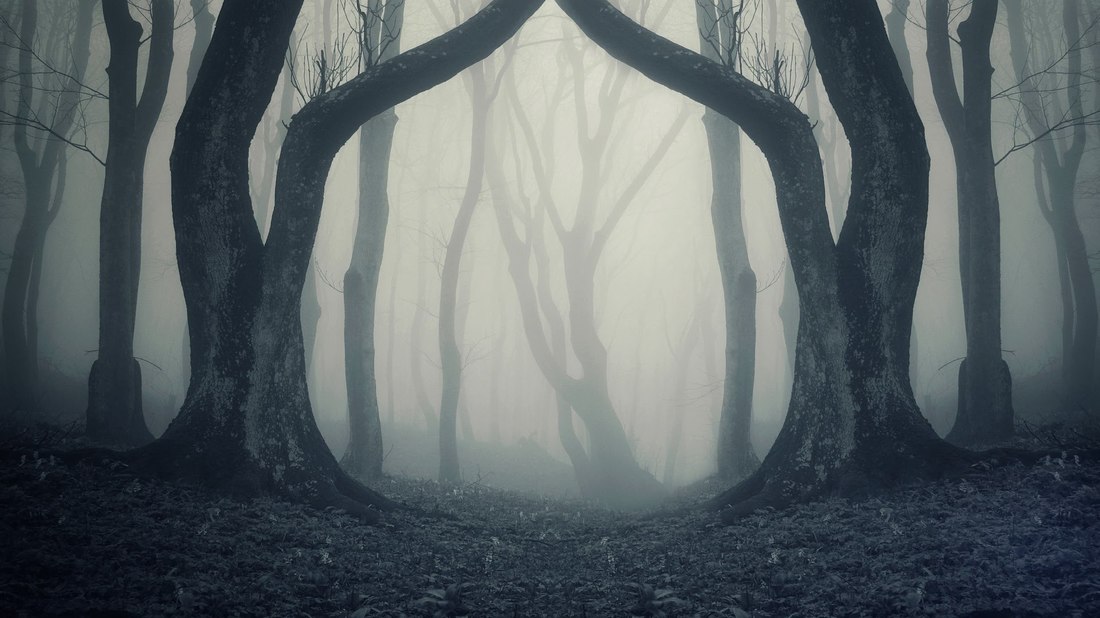
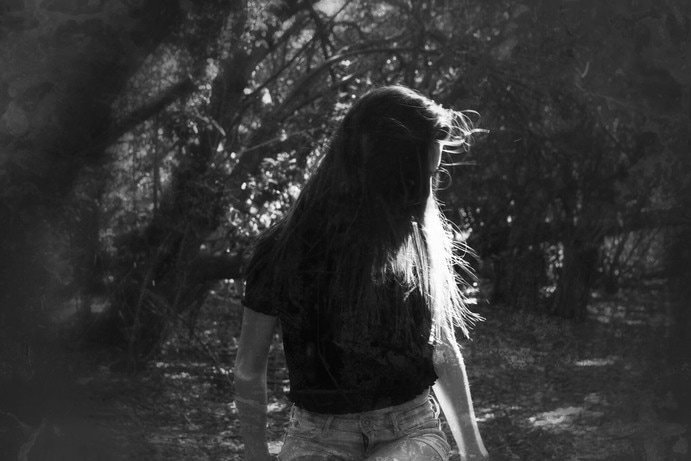
Composite Project
|
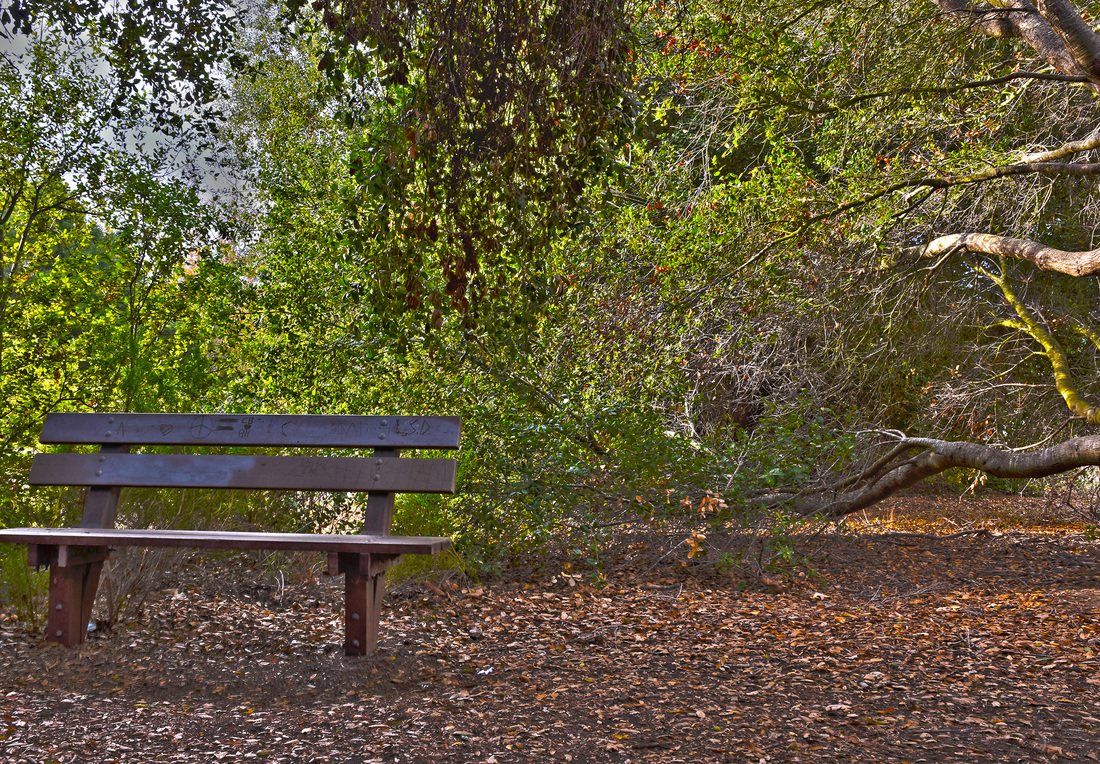
What I did was, I took the picture of my friend Olivia Garcia, and I made it black and white and I used the trees as a back ground and I looked up lemurs because she told me that she was scared of lemurs. What I did was I used a copy stamp tool and pressed the option/alt button and go over the trees with my model and the same thing with the lemurs and I tried to clean up the edges.
|
|
|
|
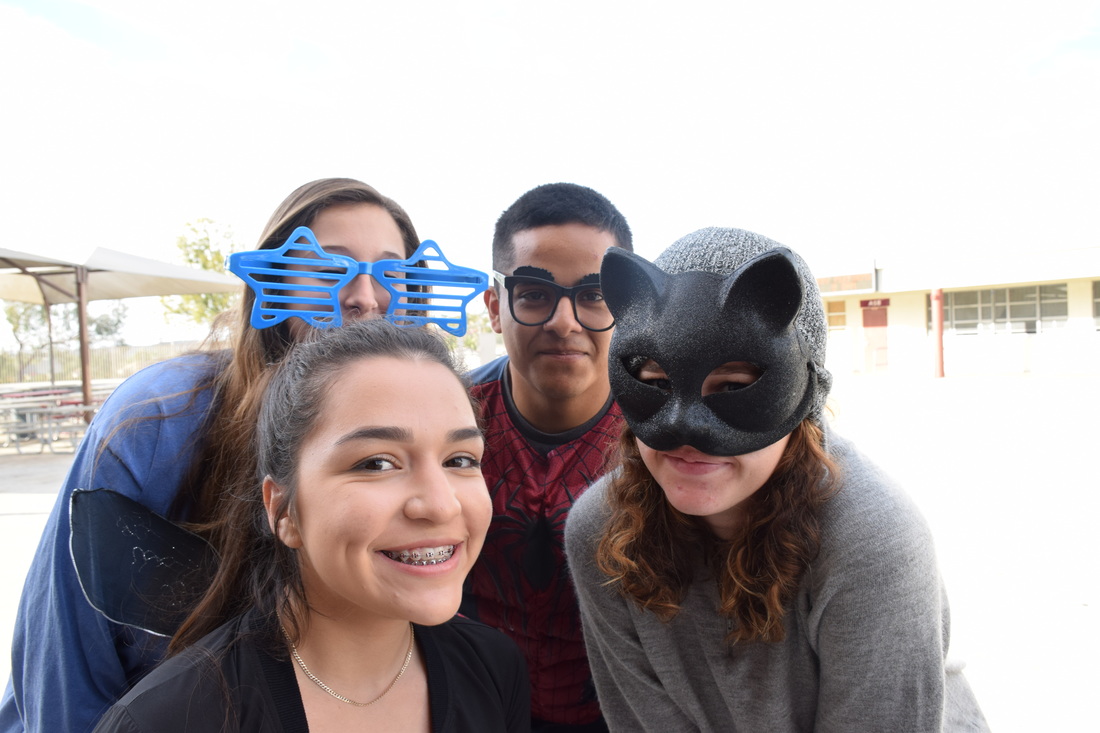
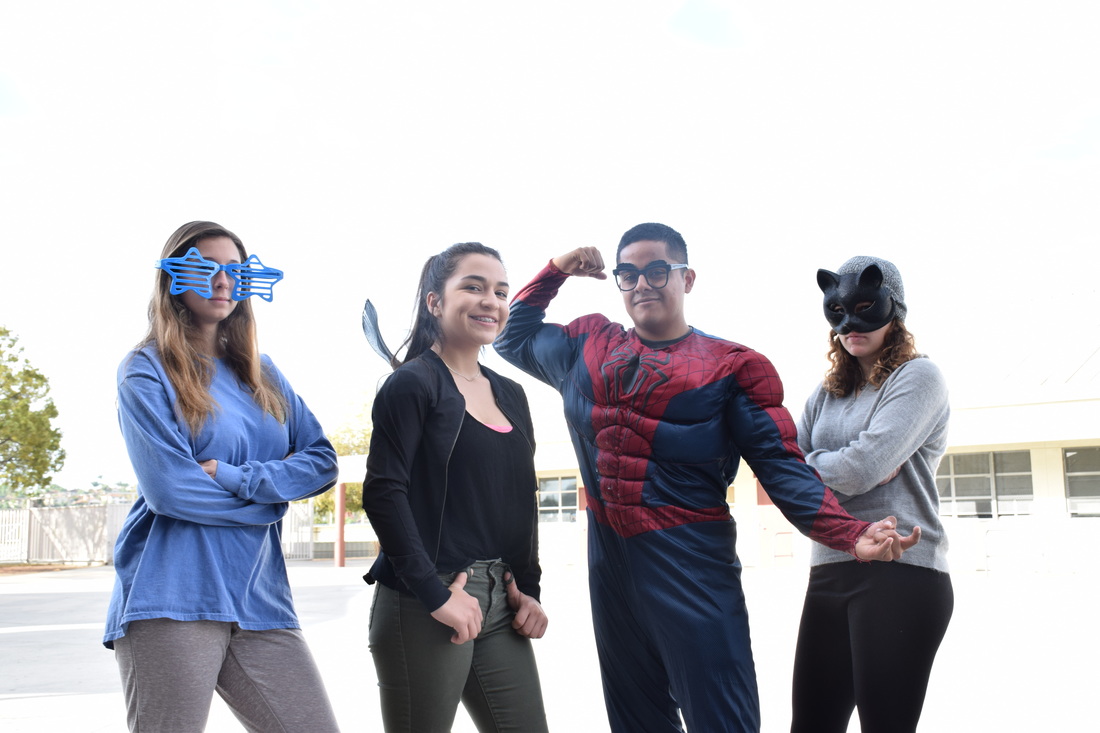
Invisible/Flying Project
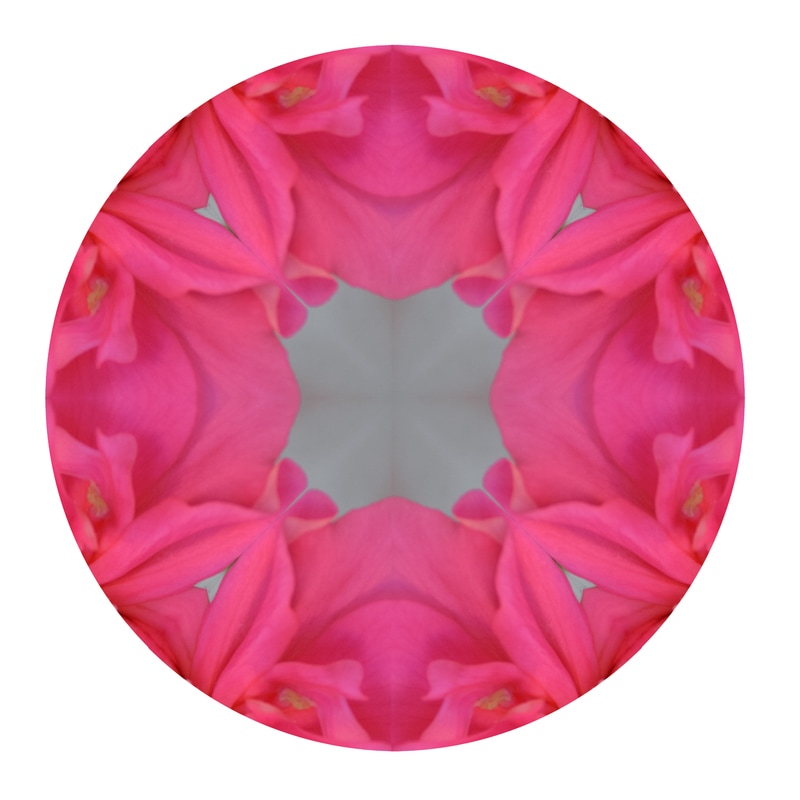
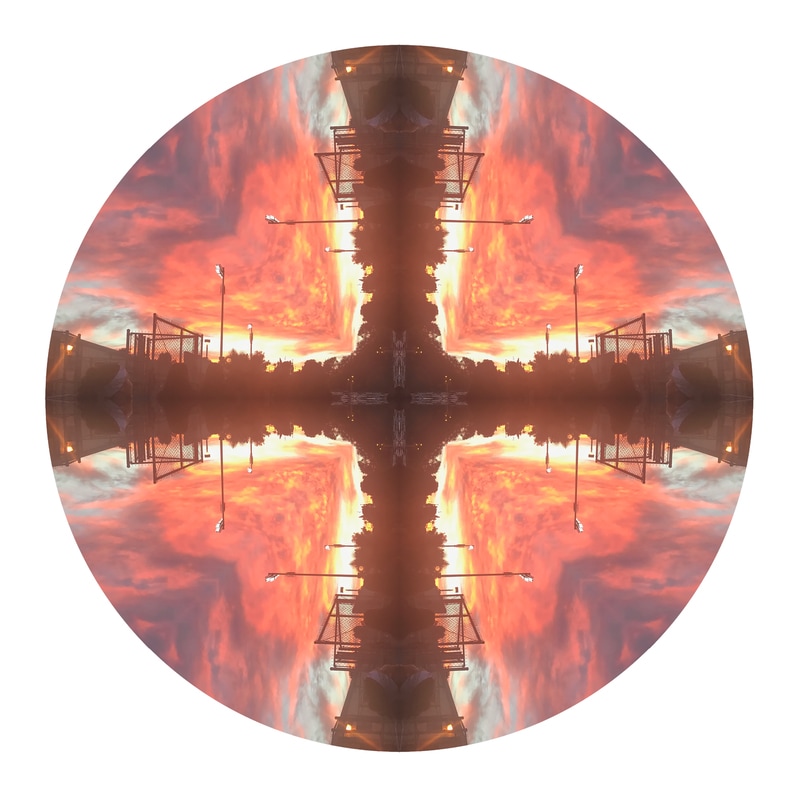
Mandalas
|
|
|
|
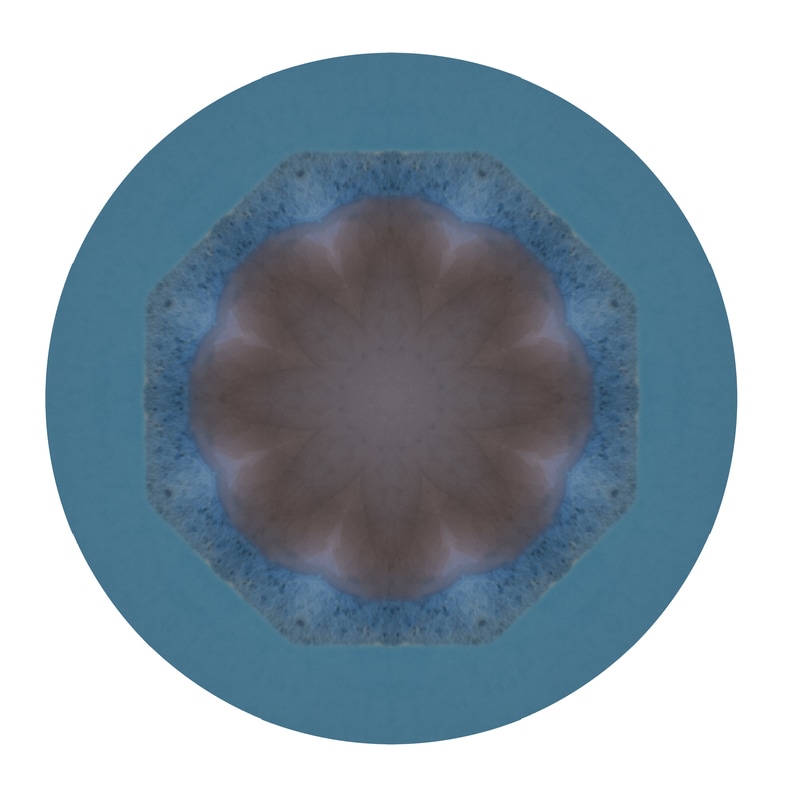
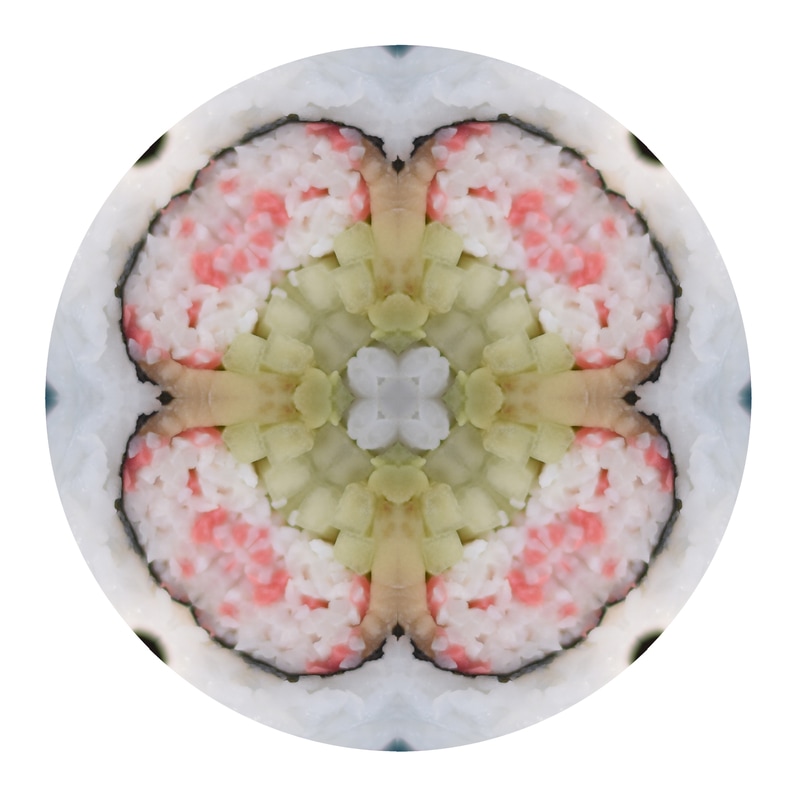
A mandala means to me, a reflection of any image. How I created these mandalas, were first I get the mandala templet from my teacher. Then i click on it twice to open it in photoshop and I get the magic wand tool and I click on the top right one and I drag it to my picture and once I find a spot I like, and I press command C to copy the section and i go to the templet and press command V to paste the section. Once I have that, you can press command V again to get another piece of pie. When you have that, you go to edit-transform-flip horizontal-rotate. When you do that, you are able to move it where you believe it fits and looks right. Then you go to the side and press command click on both the layers then you go to layer-merge layers. When you have your layers merge, you go back to layer and you click duplicate layers and press okay. You drag the extra layer to the other side, go back to edit-transform-flip horizontal-rotate. You then move it where you believe it fits. Go back to layers-merge layer. After, you go back to layer-duplicate and press okay again. drag the bottom half to the bottom, you can then delete the templet and put the bottom half again, where you think it fits. You can also use the arrow keys by the shift bottom and move the section. Finally, merge layers again, then save it to your desk top. I liked playing around with different sections on different pictures not thinking that the mandalas would actually turn out better than I thought. I don't think I really struggled with anything. If I did it differently, I would just use different parts of the pictures. I would defiantly do this again. I had lots of fun having an open mind through it all.
|
the challenge mandala
|

|
|
Portraiture
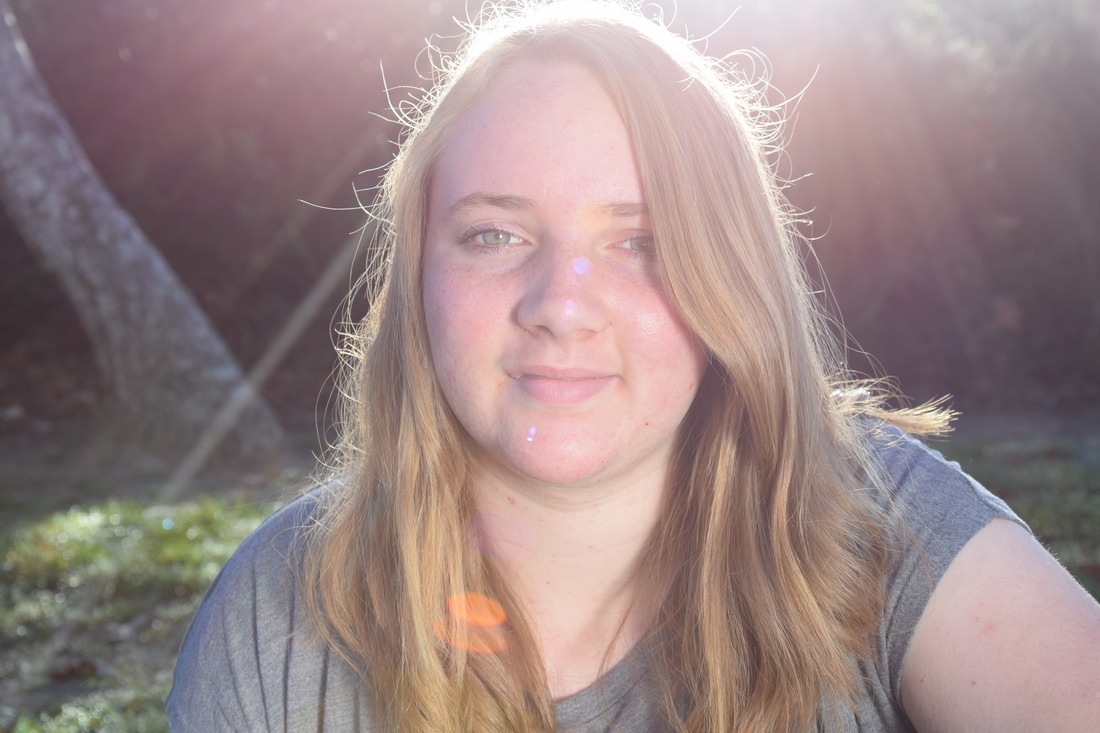
ISO 200 aperture f/8 shutter speed 1/250
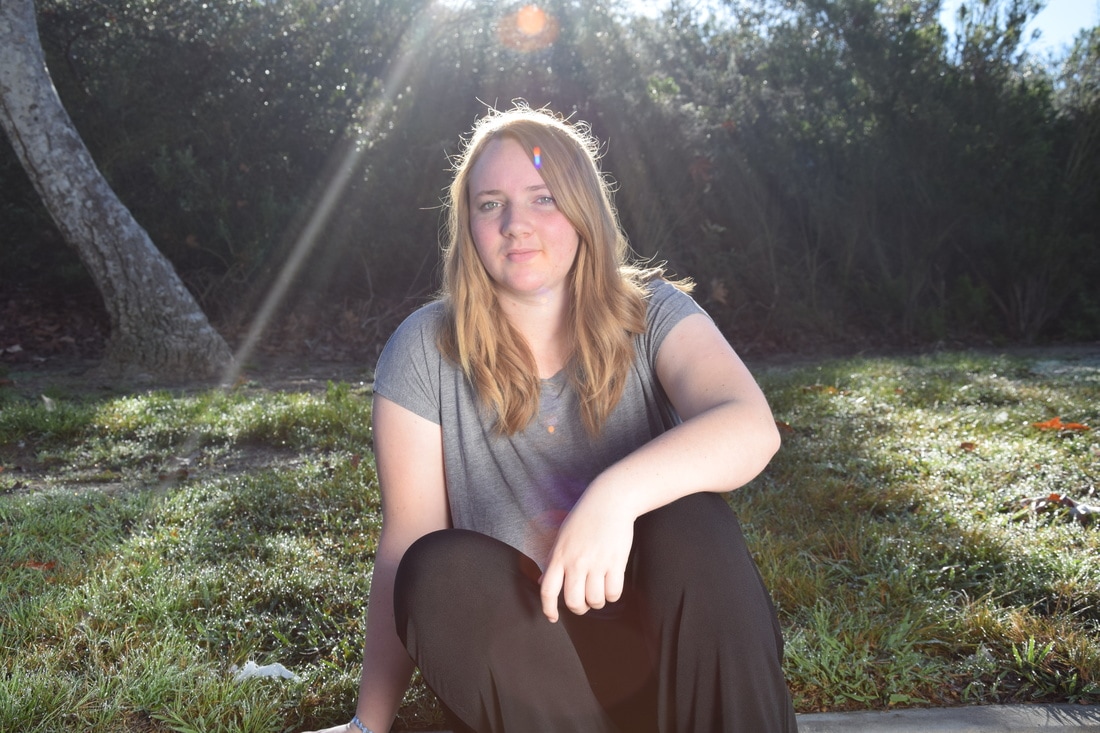
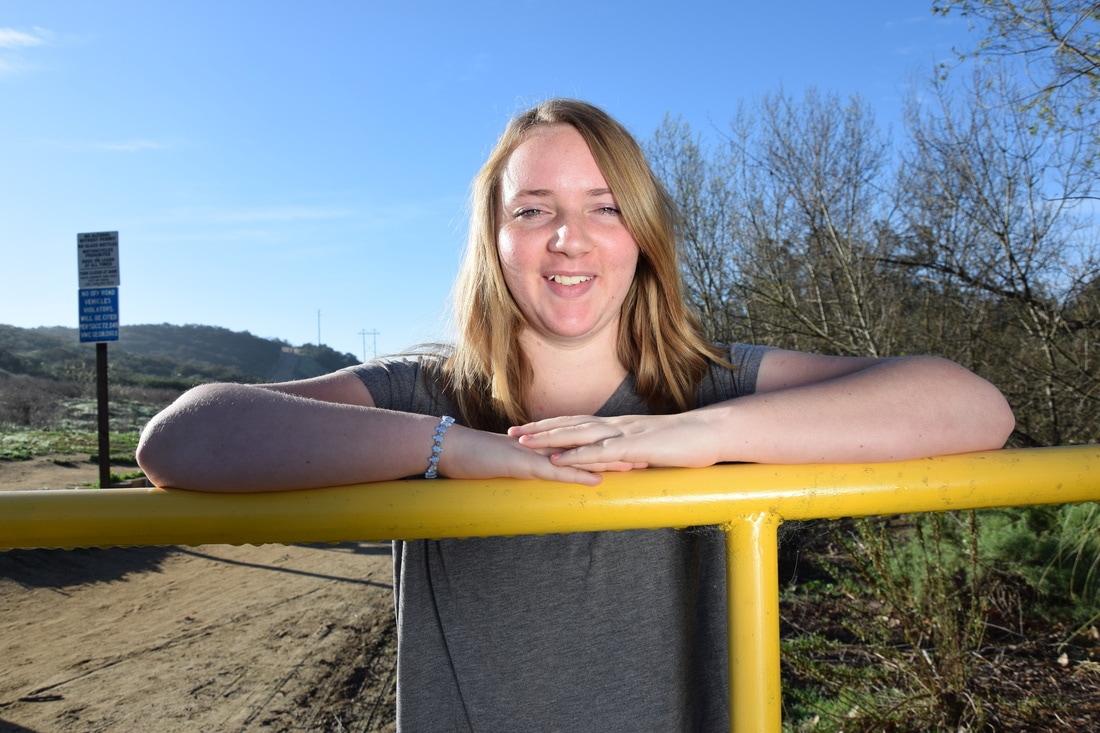
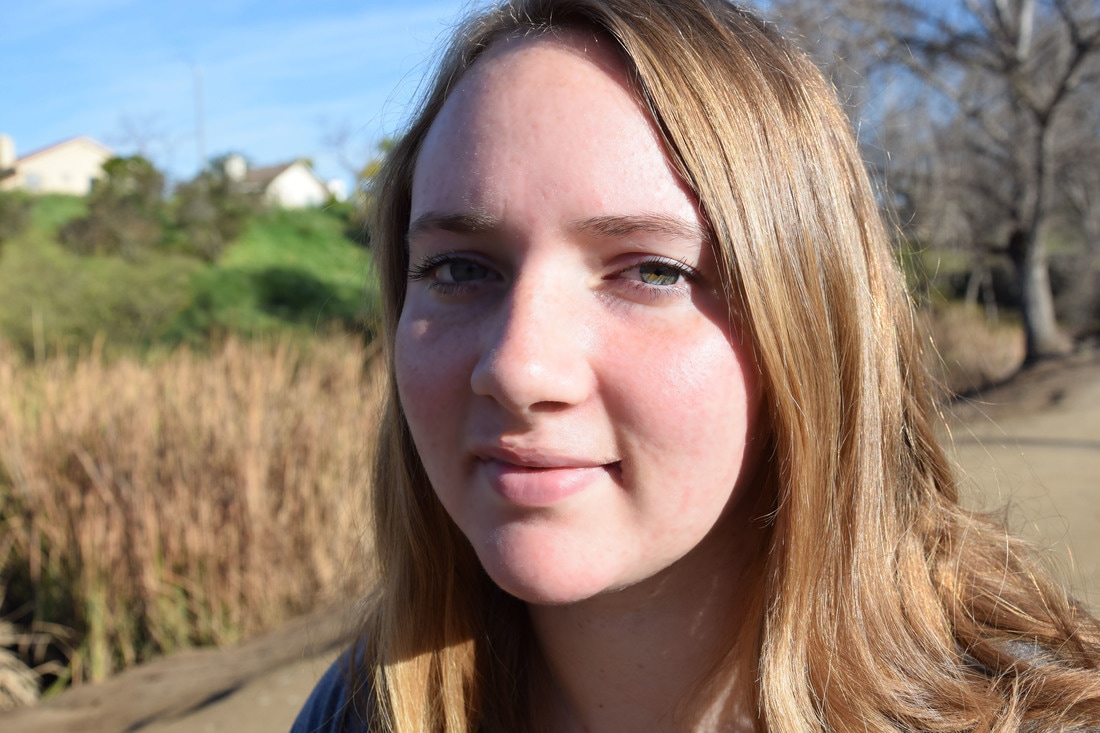
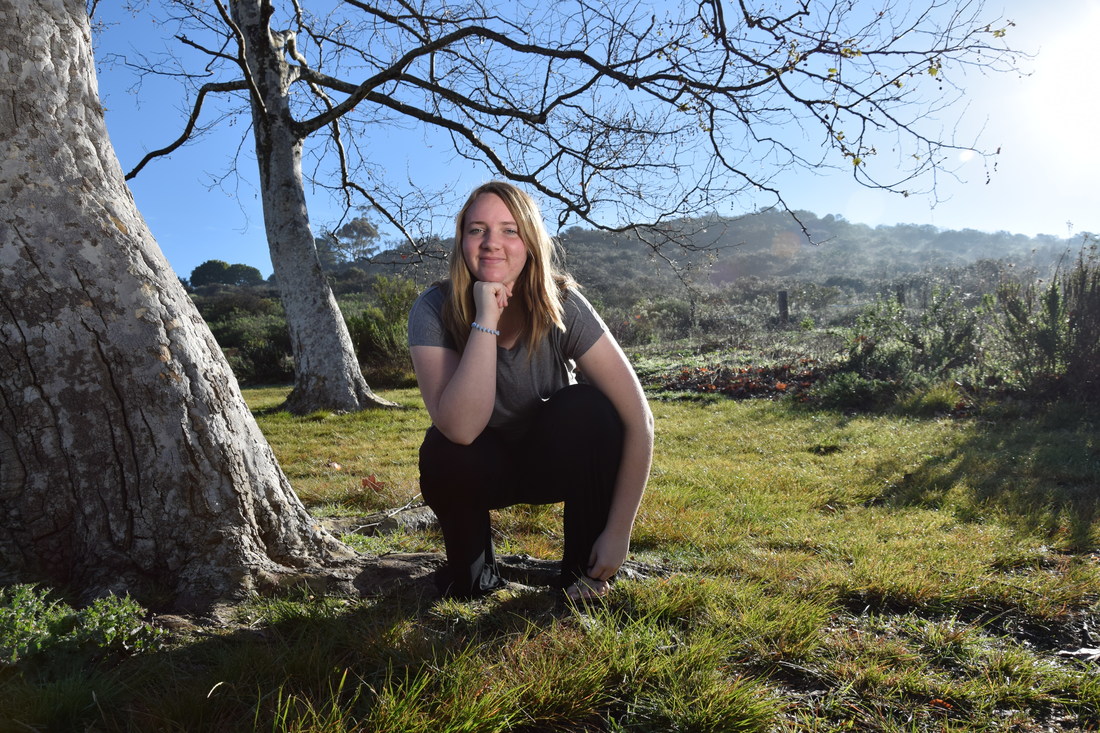
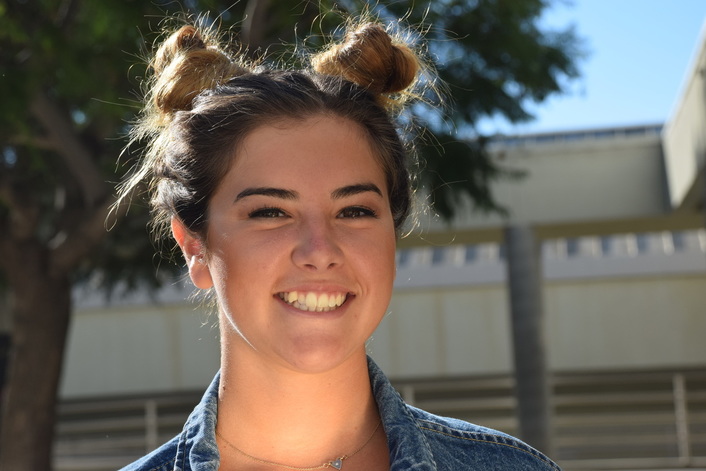
What I learned about going to the duck pond for portraiture pictures was the background matters. Also where you place your model matters because you don't want your model in the shadows where you can't see him/her; and you have tons of natural lighting you can use to your pleasure. What I did for the positions were I looked for any randoms in the background (trashcans, people, cars, etc) it doesn't make the picture look bad. The poses I had my model use where somewhat helpful because you see in this picture, the sunlight is giving her hair a nice glow and her eyes are lightened up as well. I used the reflector for a more golden tone to give her more light on her face in the shader areas we were in. I didn't retouch these pictures, besides one. I thought they came out pretty good actually.
ISO 200 aperture f/8 shutter speed 1/350
ISO 200 aperture f/8 shutter speed 1/500
ISO 200 aperture f/8 shutter speed 1/500
The only picture I touched up in Photoshop.
ISO 200 aperture f/8 shutter speed 1/750

ISO 200 aperture f/8 shutter speed 1/500
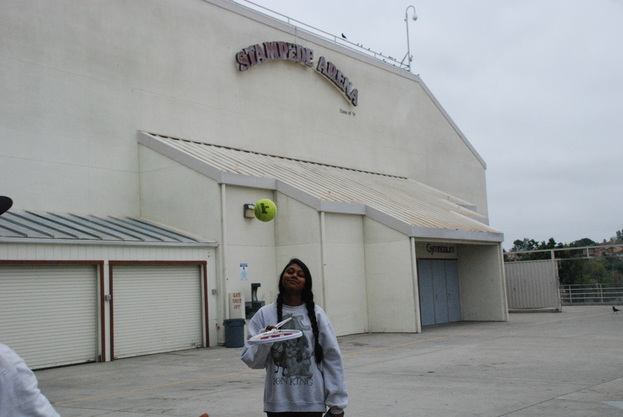
Education For All
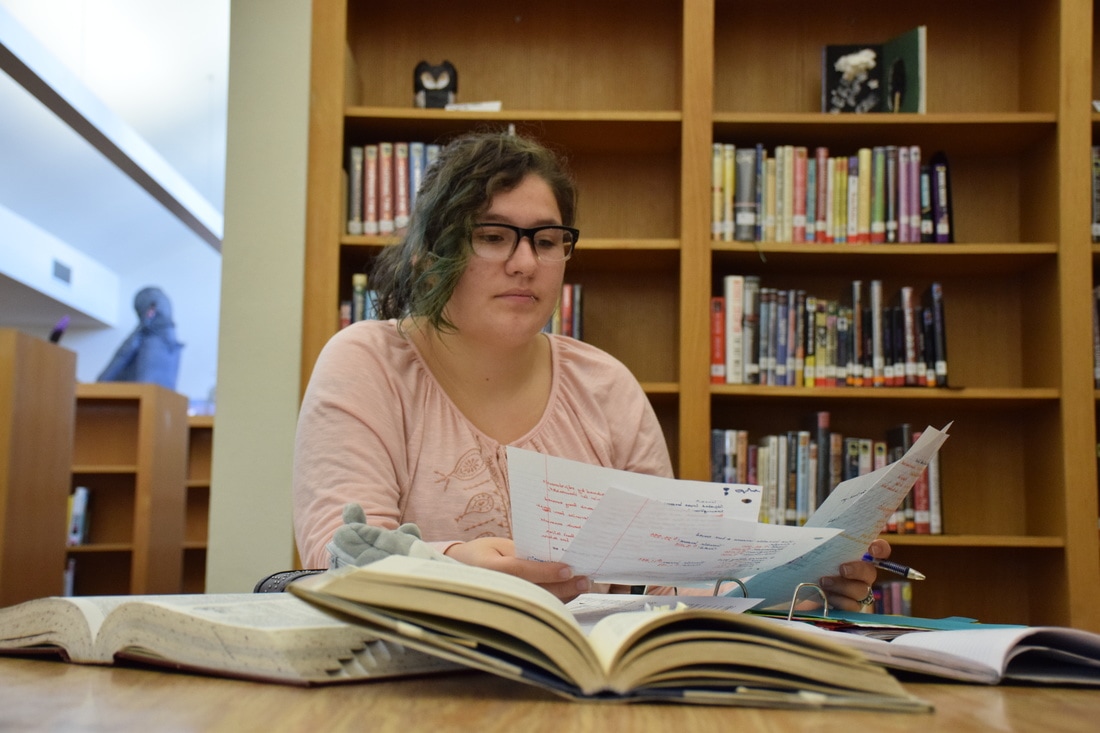
ISO 1600 aperture f/4.5 1/90
Education is given freely to millions of people. It’s your choice to take advantage of it, to use it and do well on school. This student is using her education for the better. She goes in the library so she can have peace and quiet. She believes if you study hard enough, you can achieve your dreams.
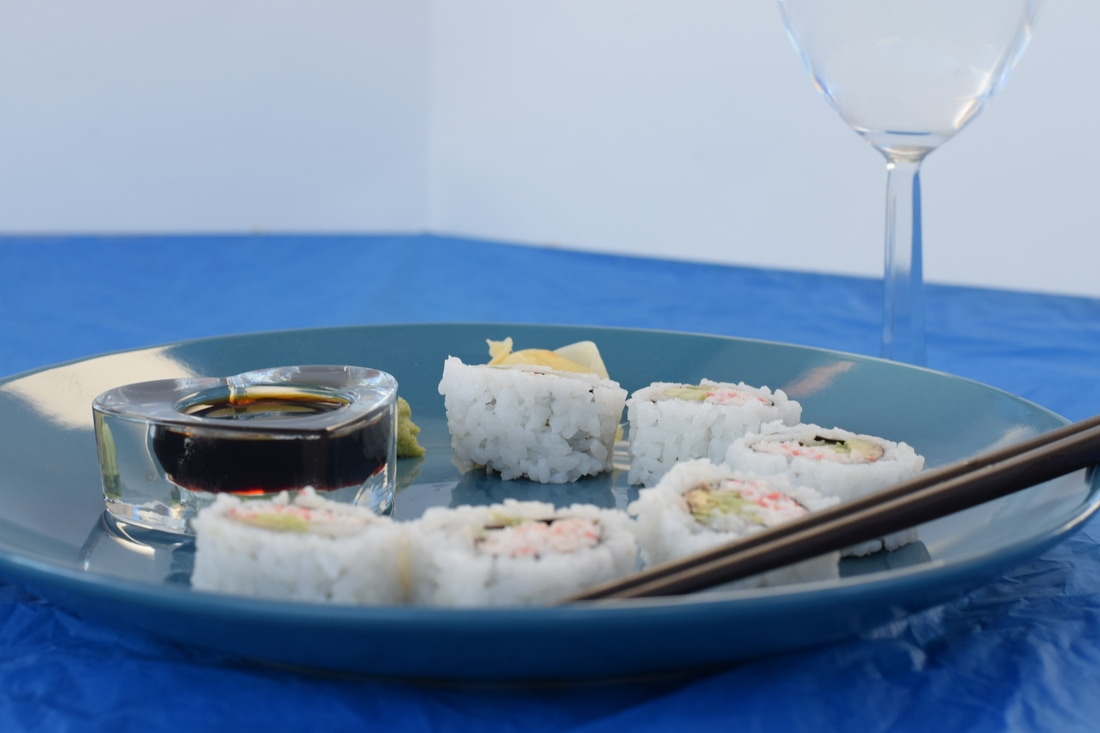
Food Photography

ISO 400 aperture f/8 shutter speed 1/60
What I brought to make my picture, was a package of sushi from Albersons and bought a plate and a wine glass from the dollar tree and the glass heart holding the soy sauce from Albersons as well. The chop sticks were from home. What I learned from the food photography video were you have to keep in mind the point of view (line, shape, color, and texture). The back ground matters because in your photos you don't want random people in your food shot and/or trees, buildings, shadows, etc. You want a nice simple background weather it's white, blue, wood, or whatever. You want it too look like it came out of a magazine when you shoot it. Use different items and move stuff around and play with your props because you don't want multiple pictures of the same style just in different apertures. That's boring. You want something to catch someone's eye enough for them to taste your product or even smell it. What I did to make my pictures similar to professional ones, what I did is I placed the sushi in a row of three, equaling to six and placed the chopsticks next to it trying to not cross them too much. I didn't have enough room for my soy sauce so I placed it next to my plate so you can see the top part and tell it's a heart. What I learned that I didn't know before was you want an item to be the main point in some pictures. You will see i have the soy sauce the main focus or a sushi in the main focus and everything else in blur. The only business I could think of that has to do with food photography is advertising. I believe I was pretty successful in this project because I'm not the type of person to take pictures of my food before I eat them, I'm usually the person who photographs the sunrise/sunsets and pictures of my friends or for my friends. I would definitely do this again. I had fun doing this and once I get my own camera, I would like to do that type of style in photography.
ISO 400 aperture f/8 shutter speed 1/180

ISO 400 aperture f/1.8 shutter speed 1/1,500

ISO 400 aperture f/1.8 shutter speed 1/1,500

ISO 400 aperture f/1.8 shutter speed 1/1,500

ISO 400 aperture f/8 shutter speed 1/750
Midyear Gallery

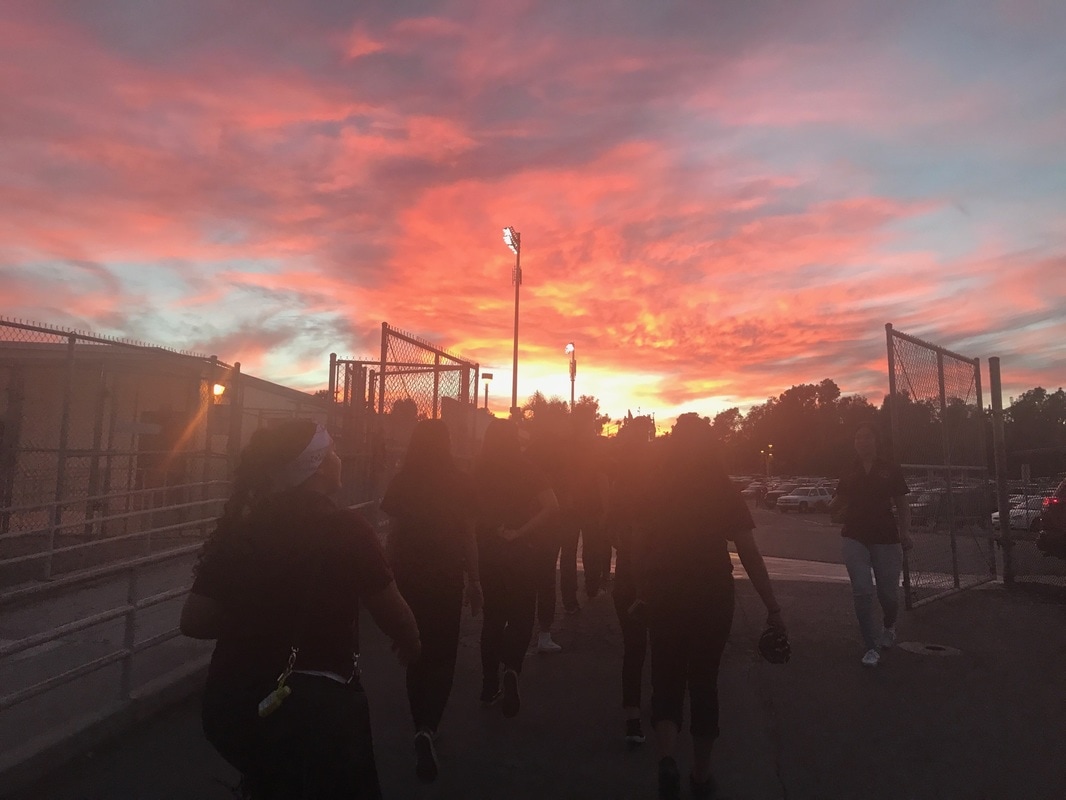
Ashley Hurlbutt, Class of 2018, Skies and Music Notes
My picture is of the sunset and my choir class going to the football field to sing the national anthem. I titled it Skies and Music Notes because I captured two things I go to escape and make me feel calm. I didn’t use any edits on it. I used my friends IPhone walking into the football field. I enjoy this photo because the sky seems so calming and it has my favorite thing to pass the time and distress myself. I think it’s a successful photo because I really captured the sky and my friends having a good time before we knock everyone’s socks off with our banging voices. If I could describe myself as an artist, I would say I’m a sunset and sunrise photographer. I just enjoy seeing the different colors the sky has to offer and let the beauty sink in. What I have learned this year, are different settings of ISO and shutter speed can do wonders. I’m excited to learn about more about cameras and going out of my comfort zone and photographing things I would never picture myself photographing.
My picture is of the sunset and my choir class going to the football field to sing the national anthem. I titled it Skies and Music Notes because I captured two things I go to escape and make me feel calm. I didn’t use any edits on it. I used my friends IPhone walking into the football field. I enjoy this photo because the sky seems so calming and it has my favorite thing to pass the time and distress myself. I think it’s a successful photo because I really captured the sky and my friends having a good time before we knock everyone’s socks off with our banging voices. If I could describe myself as an artist, I would say I’m a sunset and sunrise photographer. I just enjoy seeing the different colors the sky has to offer and let the beauty sink in. What I have learned this year, are different settings of ISO and shutter speed can do wonders. I’m excited to learn about more about cameras and going out of my comfort zone and photographing things I would never picture myself photographing.
Name Project
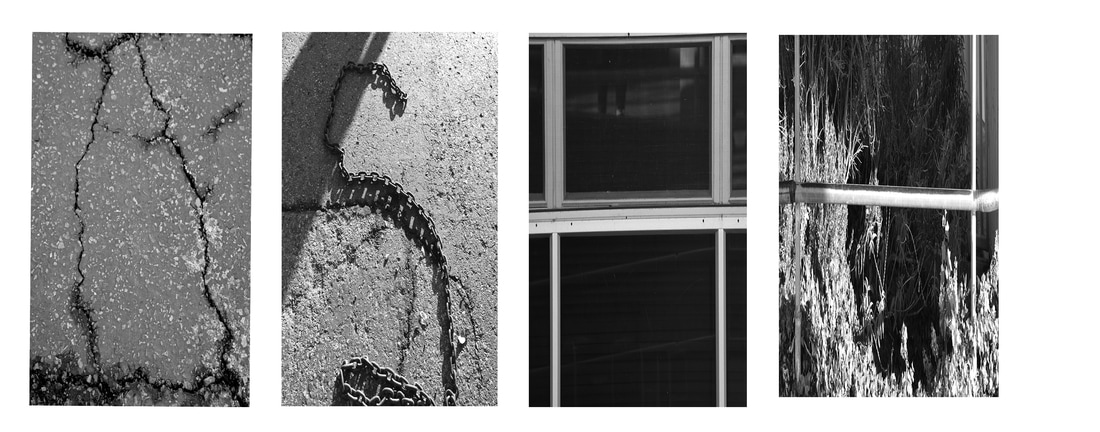
The steps I used in photoshop, were I had to first click on my picture first and make it into black and white and crop the picture just to get the just get the letter and I wouldn't have just random space surrounding it. I was sort of unclear about how to save each picture on photoshop and make it the way I wanted. I was proud of thinking outside my box and being more creative with the nature surrounding me. What I like most about my art work is that no matter where I looked, I saw shapes everywhere. I think what I could of done better was maybe finding a better way to show the letter H instead of showing the H in similar ways.
HDR Procedure - Before and After
ISO 200 aperture f/16 shutter speed 1/45 (0.0 EV)
ISO 200 aperture f/16 shutter speed 1/6 (0.0 EV)
ISO 200 aperture f/16 shutter speed 1/3 (0.0 EV)
ISO 200 aperture f/22 shutter speed 1/8 (0.0 EV)
|
LINE
FRAMING
CROP
SYMMETRY
|
ISO 200 aperture f/16 shutter speed 1/8 (0.0 EV)
|
RULE OF THIRDS
|
Annie Leibovitz Presentation

~Super moon~
To photograph the moon:
1. Use a tripod! A flat surface will only allow you to shoot straight, and shooting the moon means that you'll be shooting up and constantly re-adjusting the tripod as the moon moves throughout the night.
2. Use a shutter release cord, remote or the camera's self timer if you don't have one, so that you don't move the camera when pressing the shutter release during a long exposure.
3. Use a zoom lens and zoom in as much as you can to the moon. It's okay if it's not a super fancy lens, this was shot using a 15 year old $100 lens. Focus in on the craters and details on the moon.
4. ISO 1250- 1600, so that you can use as fast a shutter speed as you can without losing detail-the longer the shutter speed, the more chances you have the camera will shake even slightly in the wind, resulting in an out of focus photograph.
5. Aperture priority of f/5.6 since you are not worried about capturing any details other then the moon.
6. Bracket your exposure, meaning over expose and underexpose the photograph from what the camera is telling you. Generally the camera will overexpose the moon, so you'll get nothing but a white blob in the sky. Use the exposure compensation button (the +/- button below the shutter release) and change the exposure to -0.5, then -1.0, then -1.5 and so on, until you start seeing detail in the moon. You may go as far as -5.0 exposure compensation to get what you need.
7. Take a fair amount of photos and keep refocusing as the night progresses. The photographs may look focused on the camera's display, but you won't really see if they're completely in focus until you upload them onto your computer screen.
~Halloween~
ISO 400 aperture f/8 shutter speed 1/160
ISO 400 aperture f/8 shutter speed 1/160
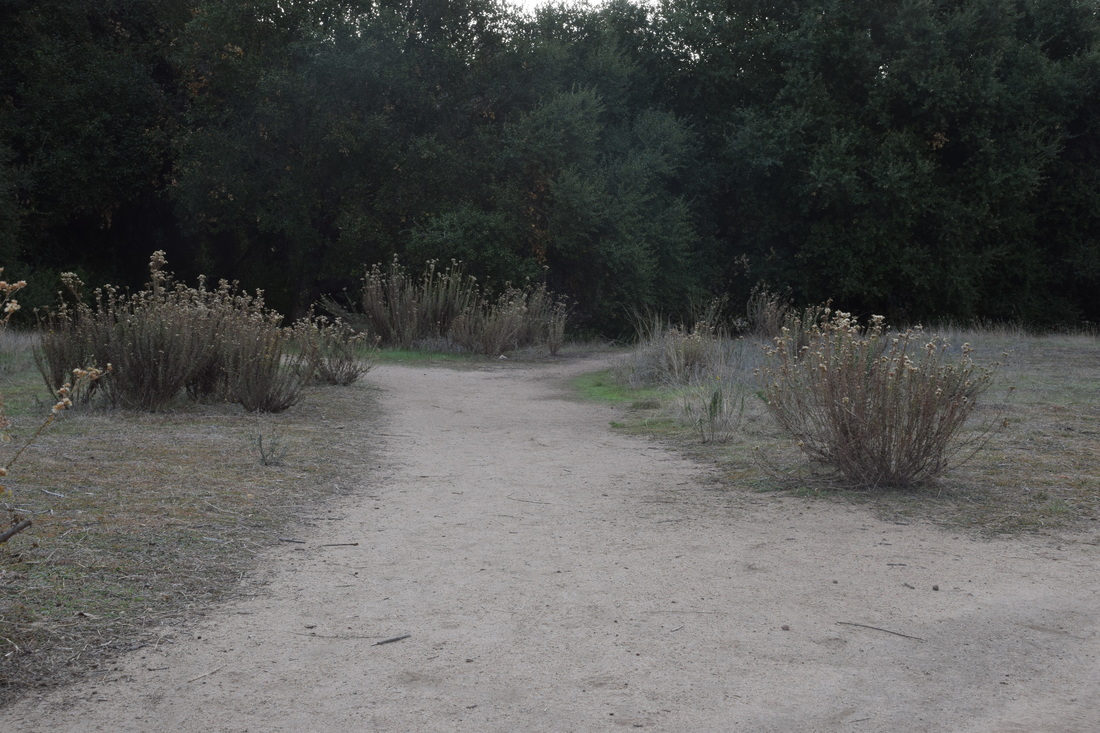
~Principles of Art~
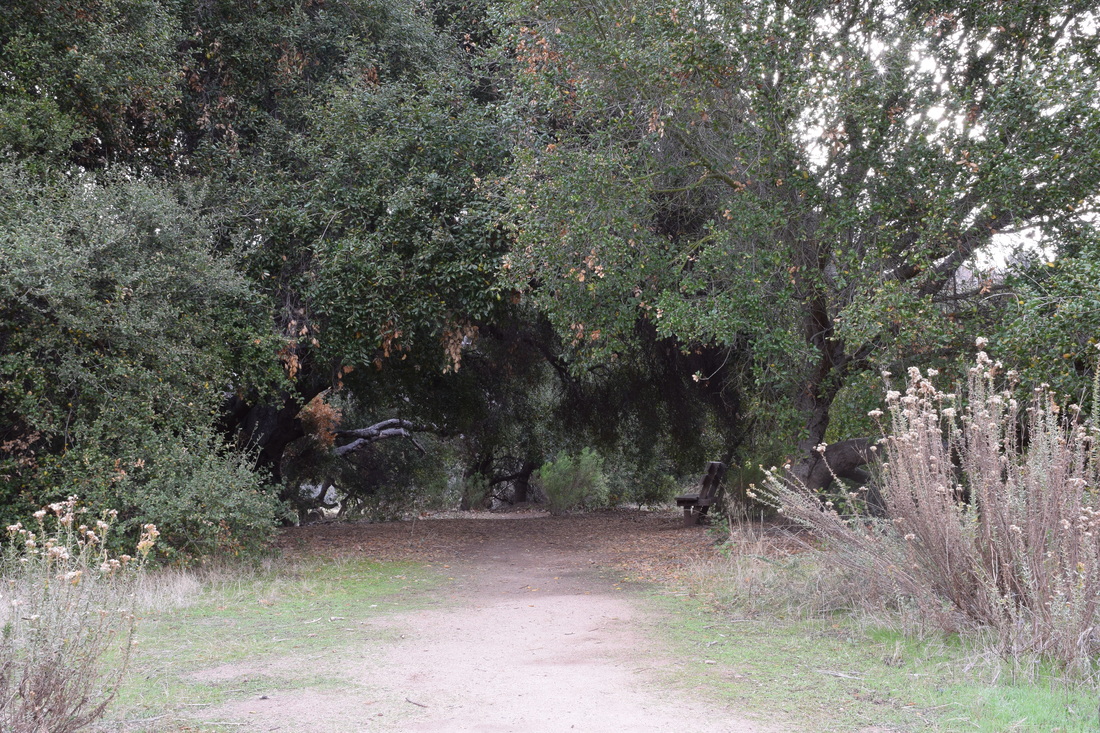
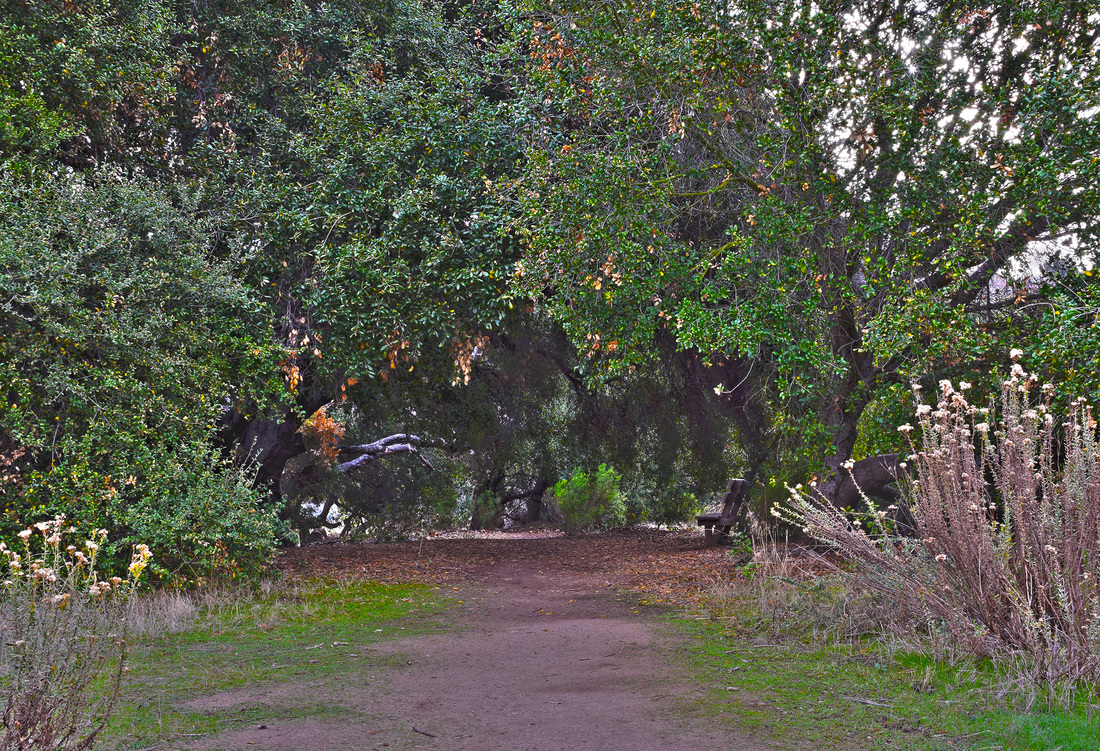
principle: unity ISO 400 aperture f/8 shutter speed 1/1,1600
This picture is of trees, bushes, and tree stumps. It's unity because you get to see the sunlight and the trees in somewhat of an odd place. This was successful because i thought it came out pretty well and the sunlight beam looks very warming.
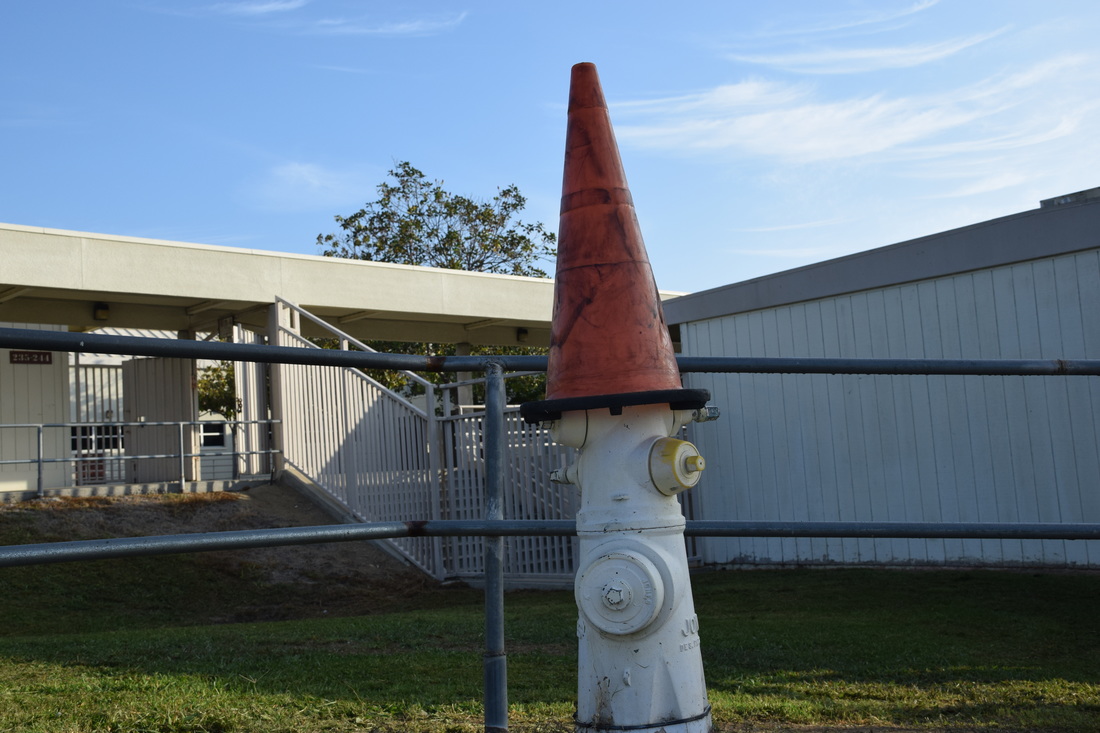
principle: variety ISO 400 aperture f/8 shutter speed 1/800
This picture is of a cone on top of a fire hydrant. This is variety because you don't normally see this on a daily basis. it was successful because I got the cone to stay steady enough for me to take this picture and I think it came out great.
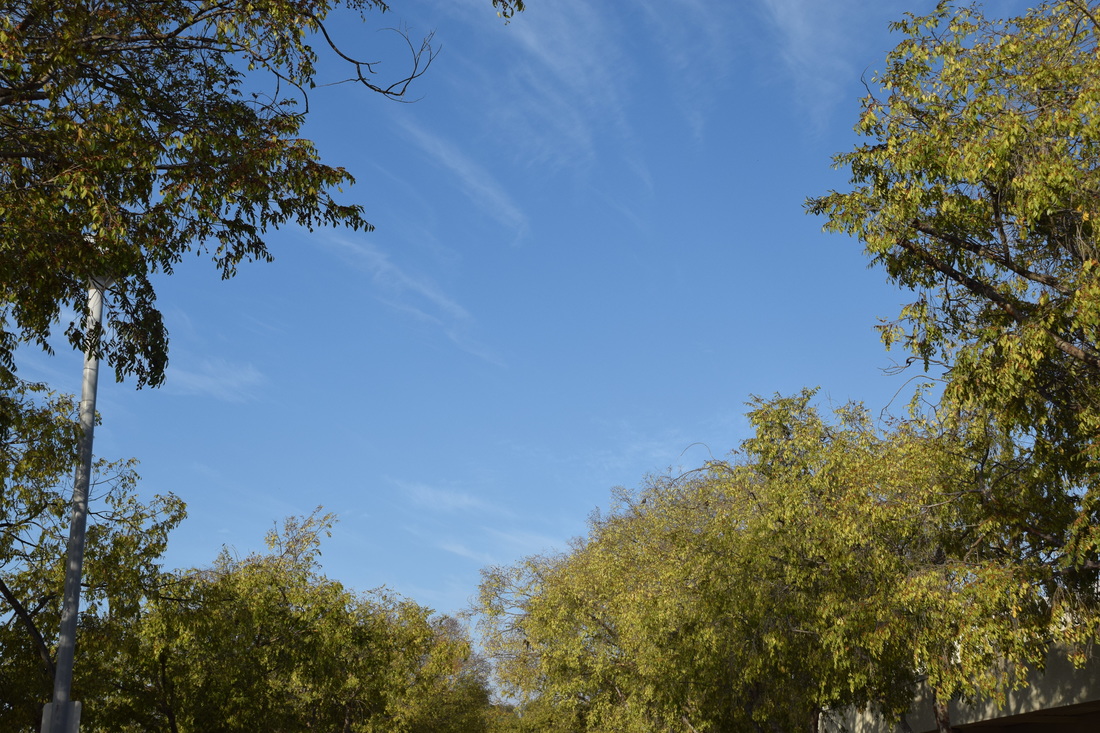
principle: harmony ISO 400 aperture f/8 shutter speed 1/1,250
This picture is of the blue morning / afternoon sky with some tree tops. I really think this picture is just very pleasing because the sky is not too cloudy but not cloudy at all. This picture was successful because I captured the warm green of the trees and the beautiful sky.
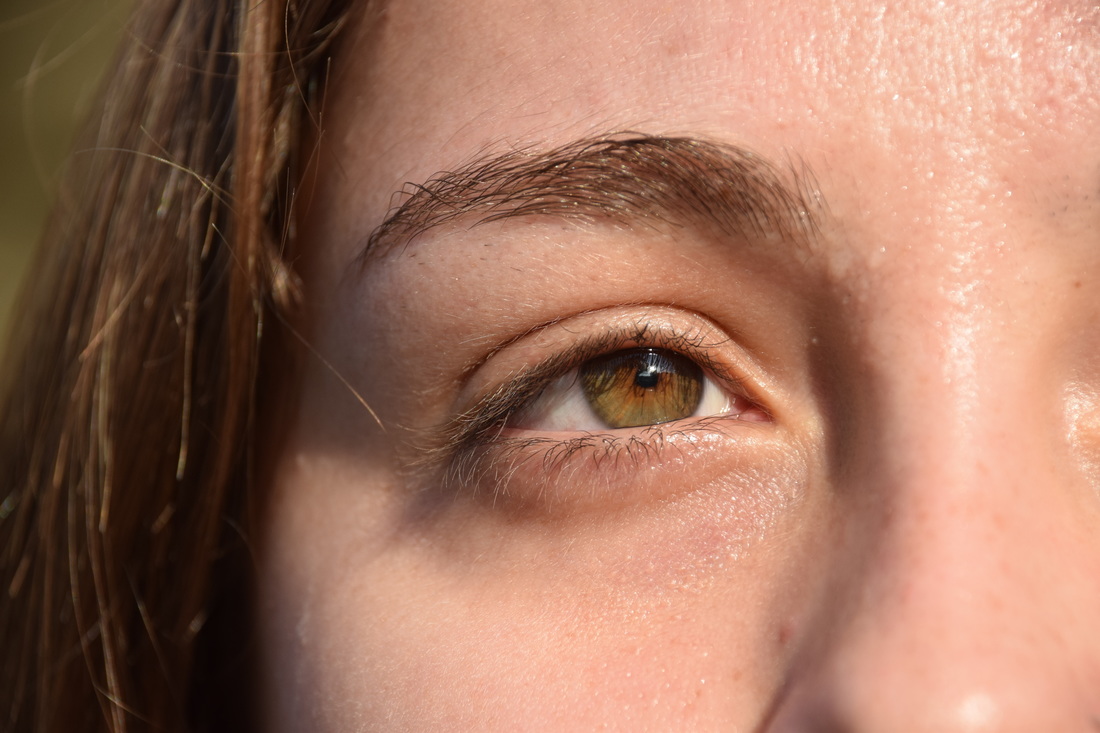
principle: emphasis ISO 400 aperture f/8 shutter speed 1/800
This picture is of my partner's eye in the sun. I used this for emphasis because in my part, eyes are the first thing I notice about someone and having her eyes be green and brown in the sun is really awesome. This picture is successful because the quality of her eyes came out amazing and in general I think it's a great picture.
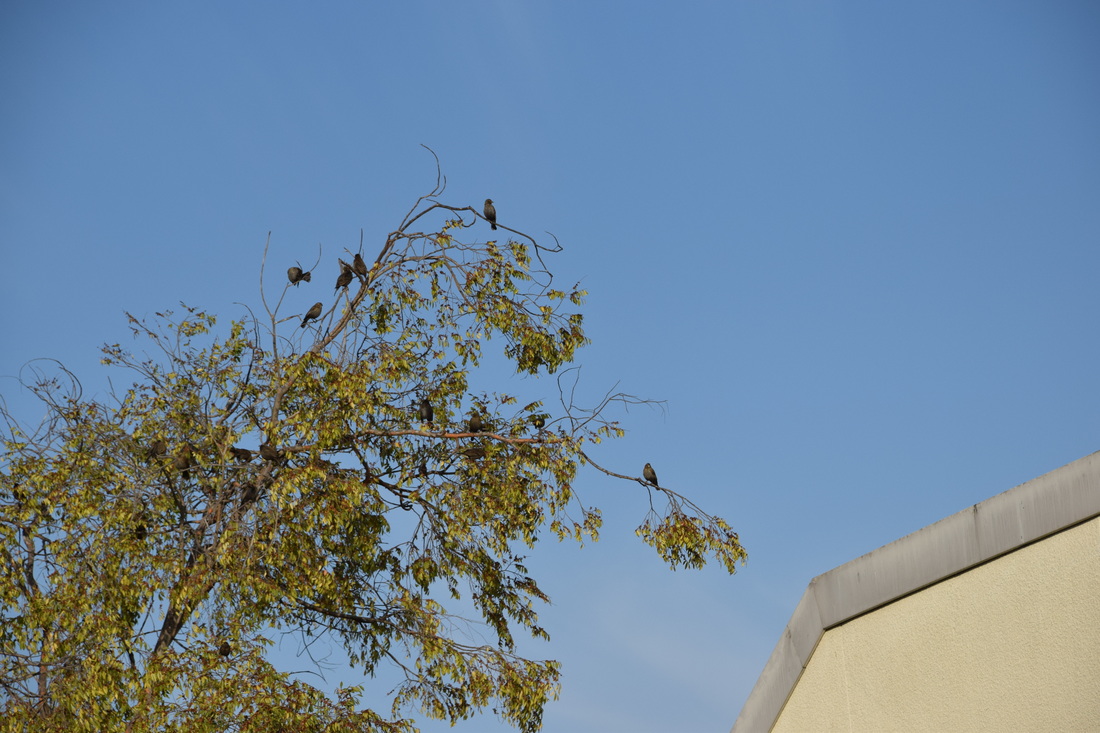
principles: rhythm ISO 400 aperture f/8 shutter speed 1/1,600
This picture is of birds in a tree. This is rhythm because you can either get a picture of someone or something in motion or in one picture. This was successful because after taking two pictures of this, more and more birds flew on the tree and it was just amazing.
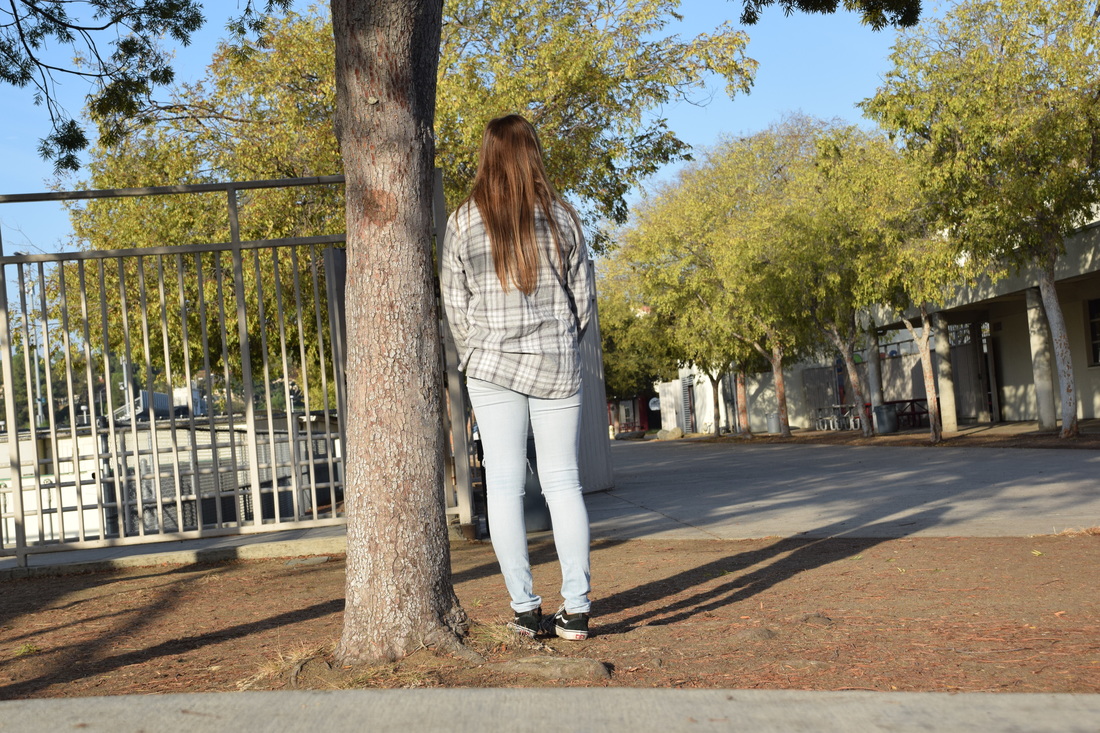
principle: proportion ISO 400 aperture f/8 shutter speed 1/800
This picture is of my partner standing next to a tree. This is a great example of proportion because the tree is obviously taller than her. This picture was successful because it gives a good idea for people to have an example of what you could do.
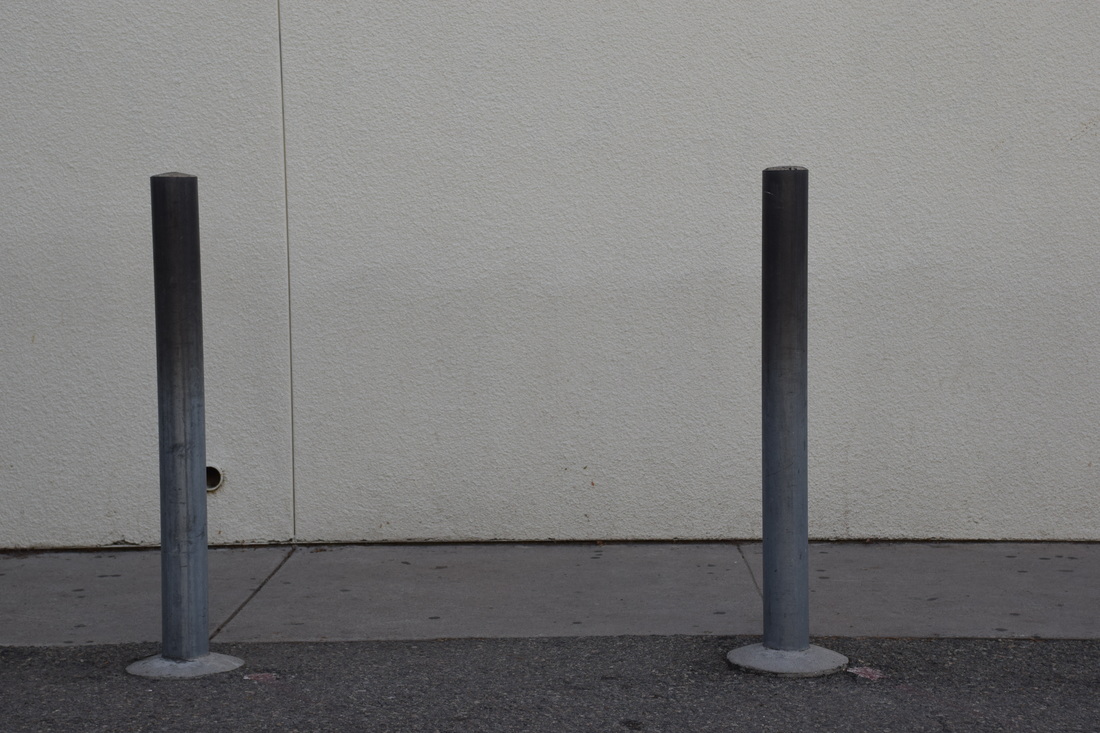
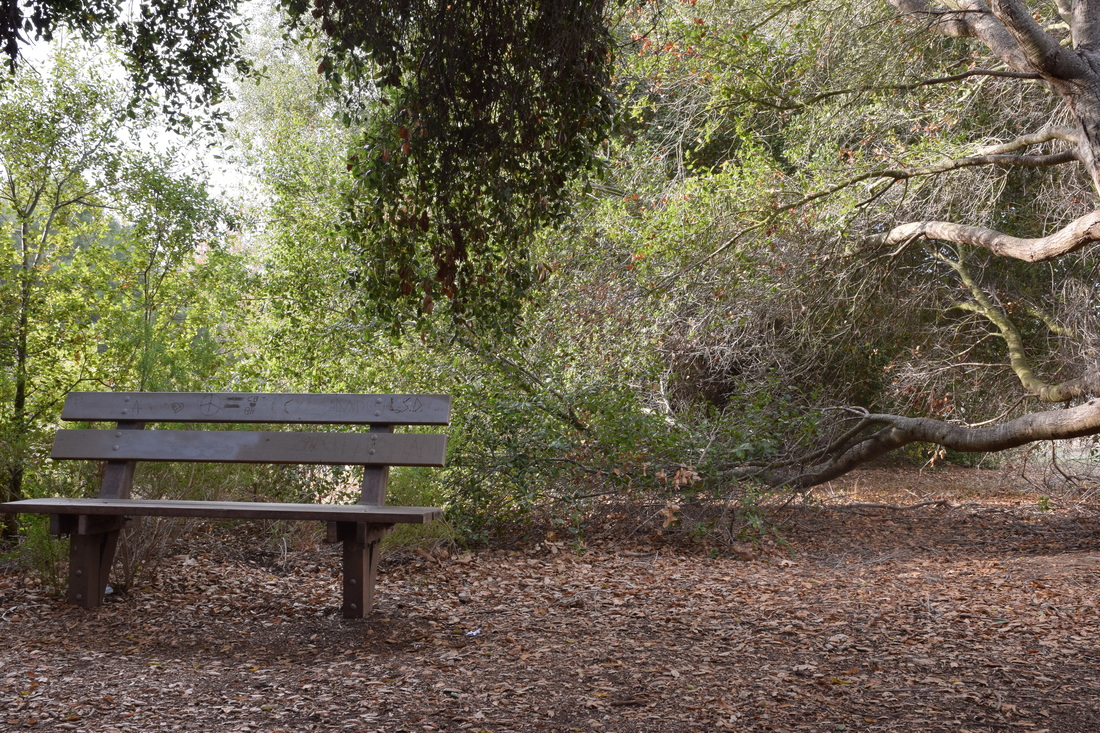
principle: balance ISO 400 aperture f/8 shutter speed 1/400
This is a picture of two poles outside the weight room. It's balance because it's two of the same item equally balancing each other out. This was successful because it's simple and easy because it is easy or sometimes hard to find something that has the same thing next to it.
~Elements of Art~
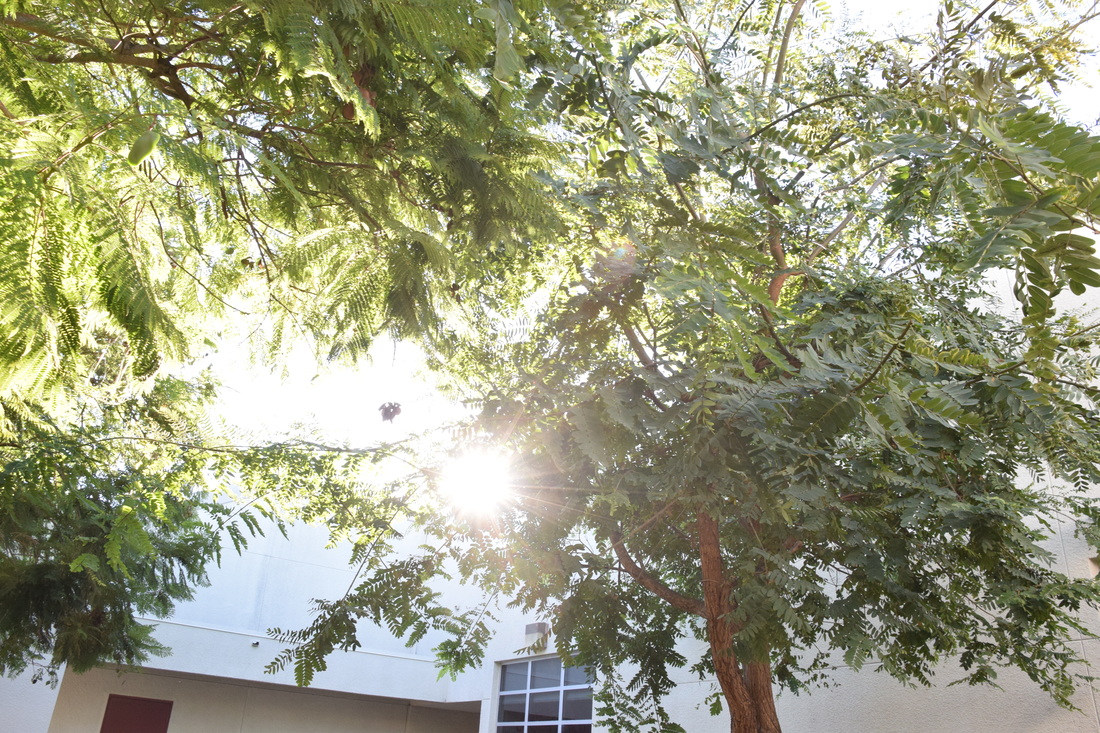
element: value ISO 1000 aperture f/8 shutter speed 1/160
This picture is of a tree with a peek of sunlight. The value look I was aiming for was having the tree be a little darkened and the sunlight be the lighter part of the picture. This picture is successful because the sunlight beam is really eye catching and it makes the other parts in the picture become a bit darker.
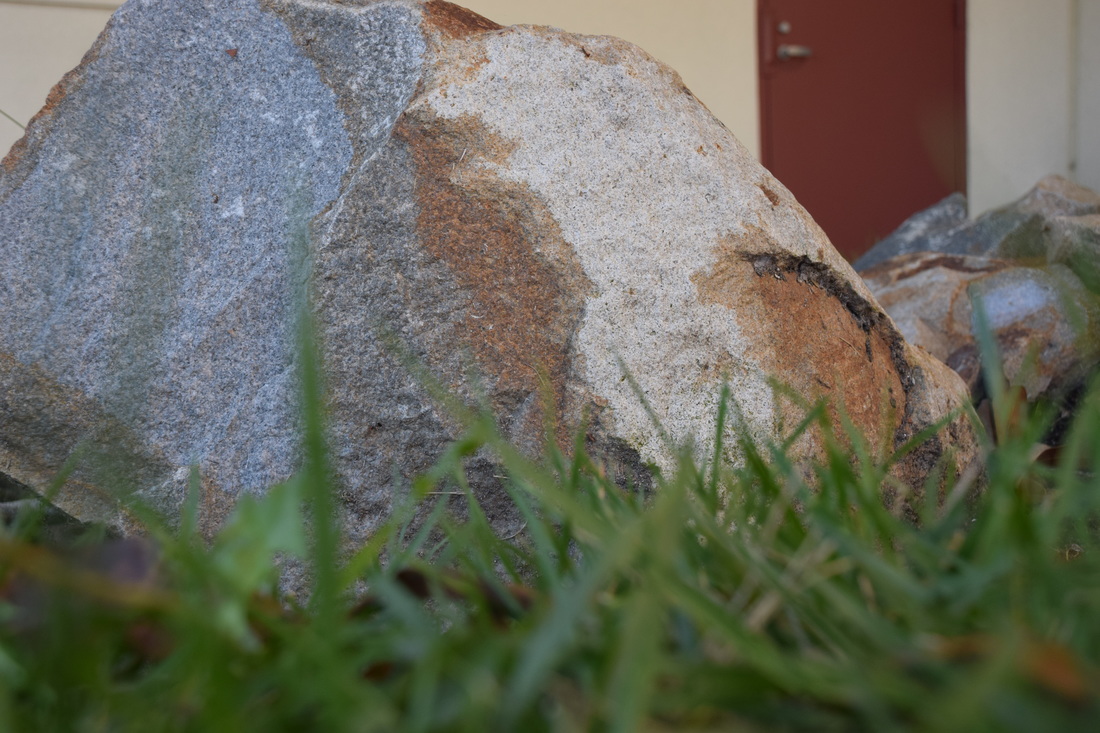
element: form ISO 400 aperture f/8 shutter speed 1/160
This picture is of a rock with a worm's eye view. It was kind of difficult to take because i wanted it to come out perfect and I had an idea to put the camera on the floor. This was successful because i love the way the grass came out and the rock is the main focus point.
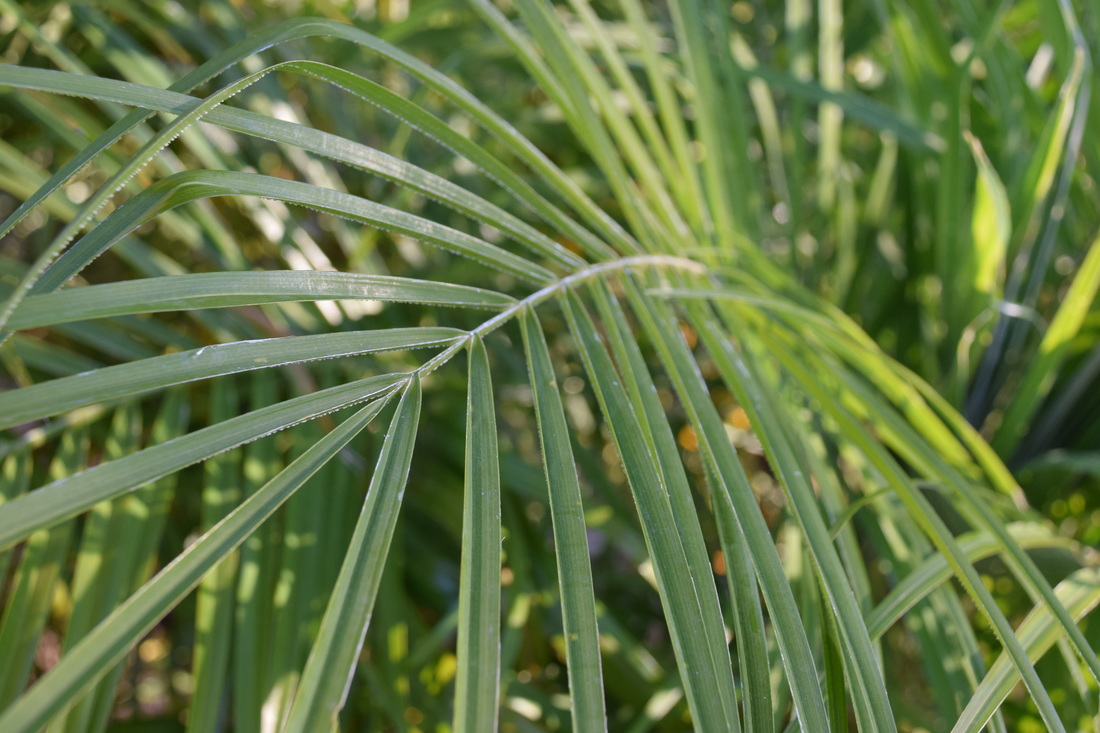
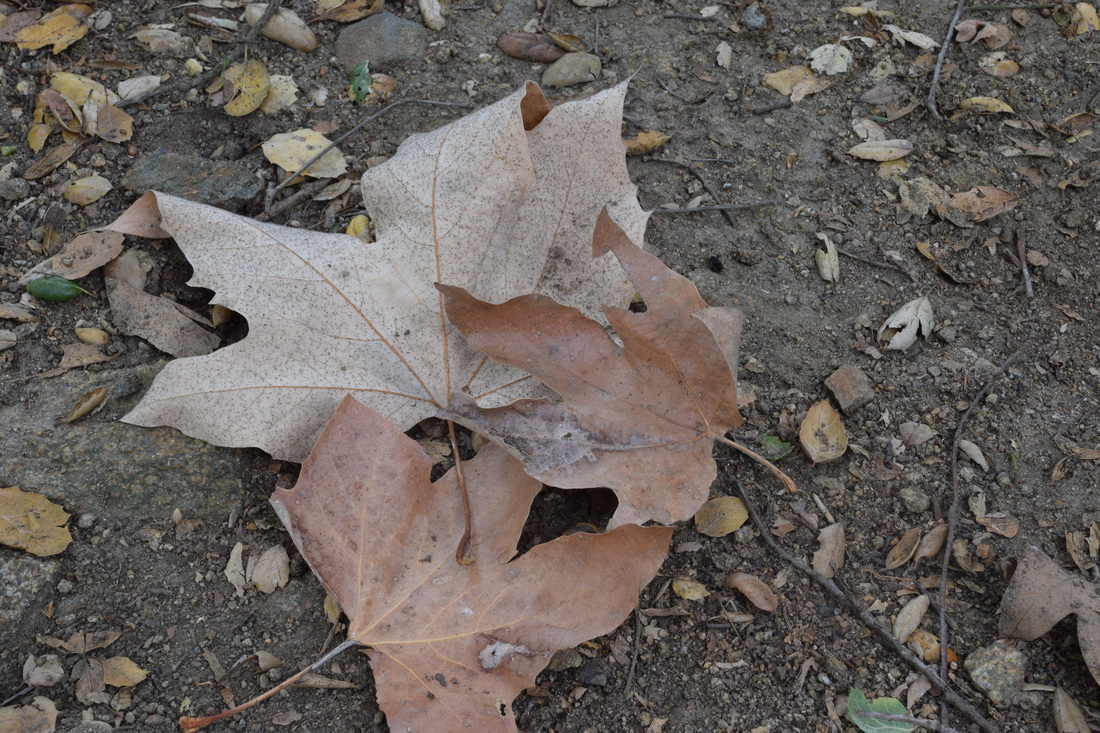
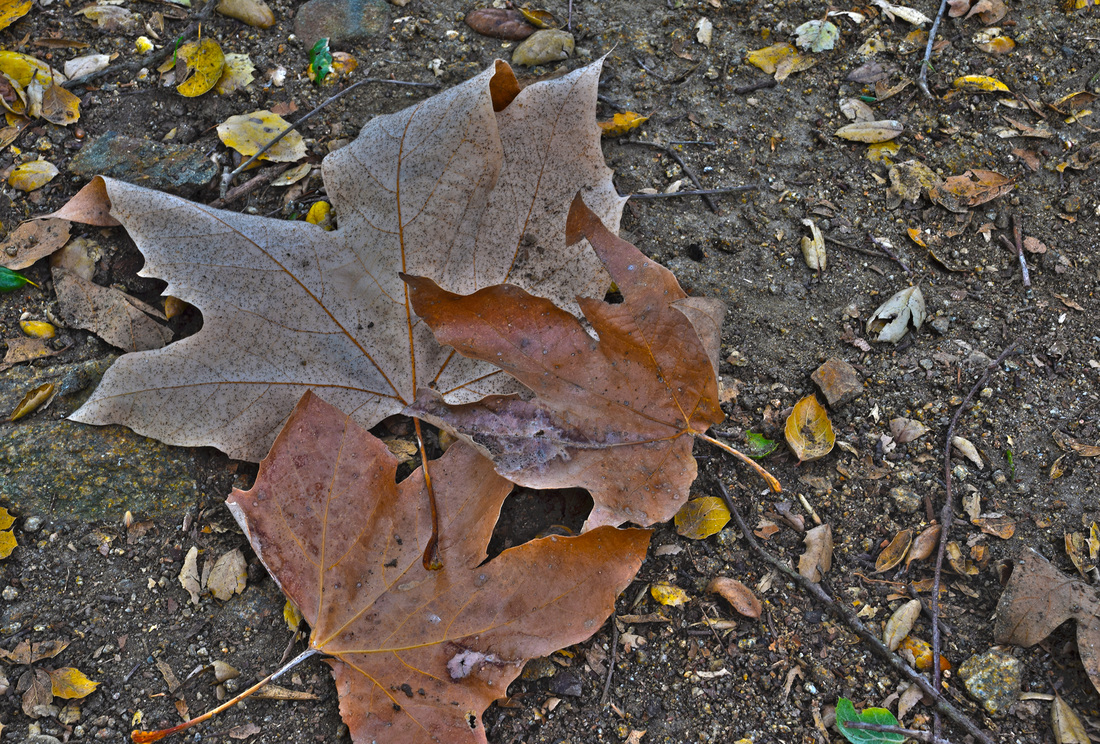
element: texture ISO 400 aperture f/8 shutter speed 1/160
This picture is a plant. For the texture look of it I went close enough for the camera to focus then I either zoomed in to out to get the perfect look. This picture is successful because you can really get an idea of what this may feel like due to the close up.
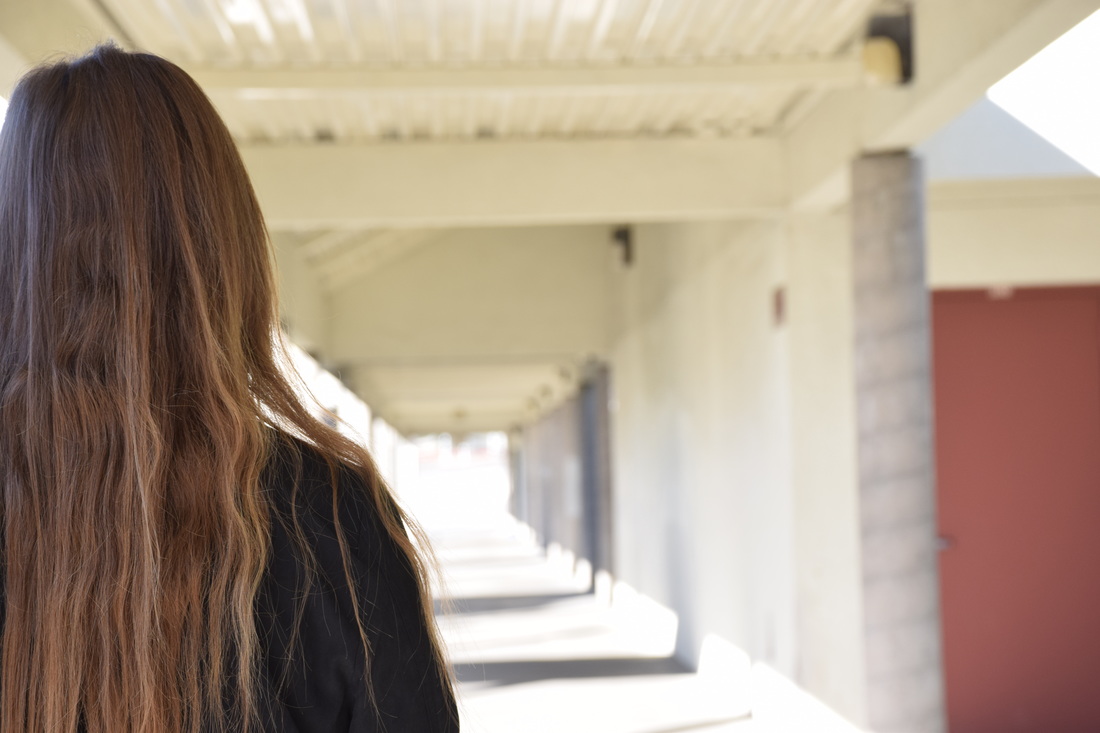
element: space ISO 400 aperture f/8 shutter speed 1/160
This photo was taken in the halls of my school and the element of this photo is the space. This picture is successful because I got very good details on my partner and the hall way came out blurry and I really like how it came out because you can see that there is a lot of space in the hall way.
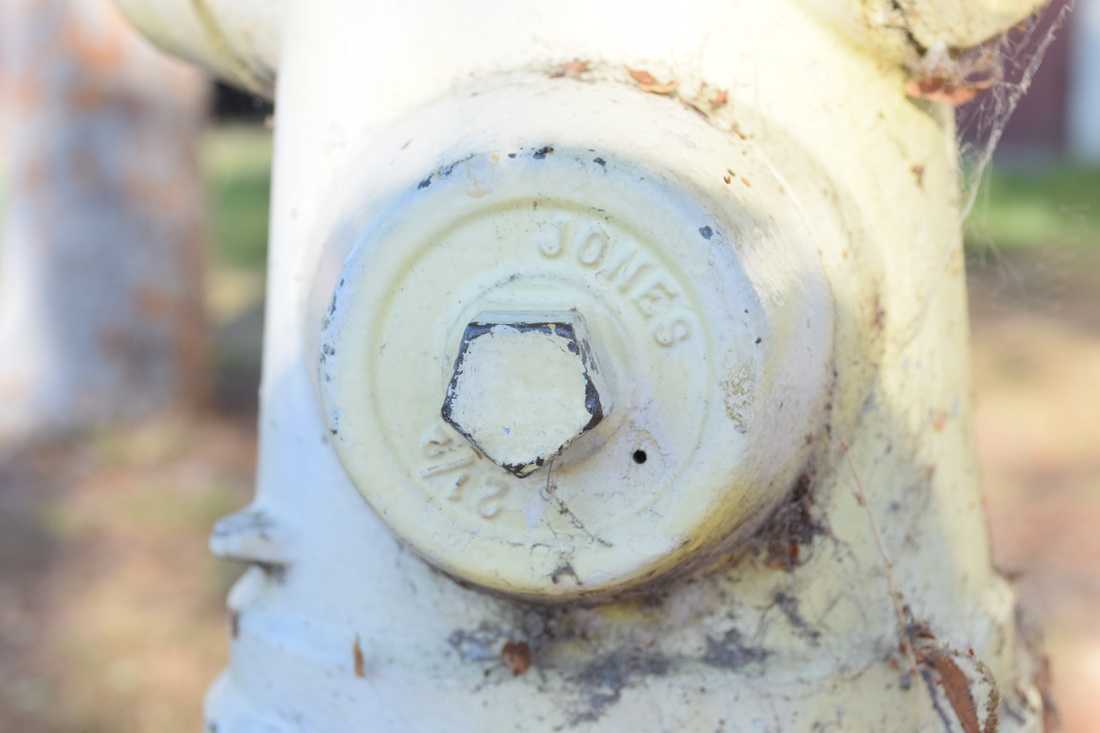
element: shape ISO 400 aperture f/8 shutter speed 1/160
This picture is a fire hydrant. This element is shape. You can see the shape of a Pentagon is the main focus. This picture is successful because i zoomed in and I really enjoy how i got the shape in focus and the rest of it came out blurry.
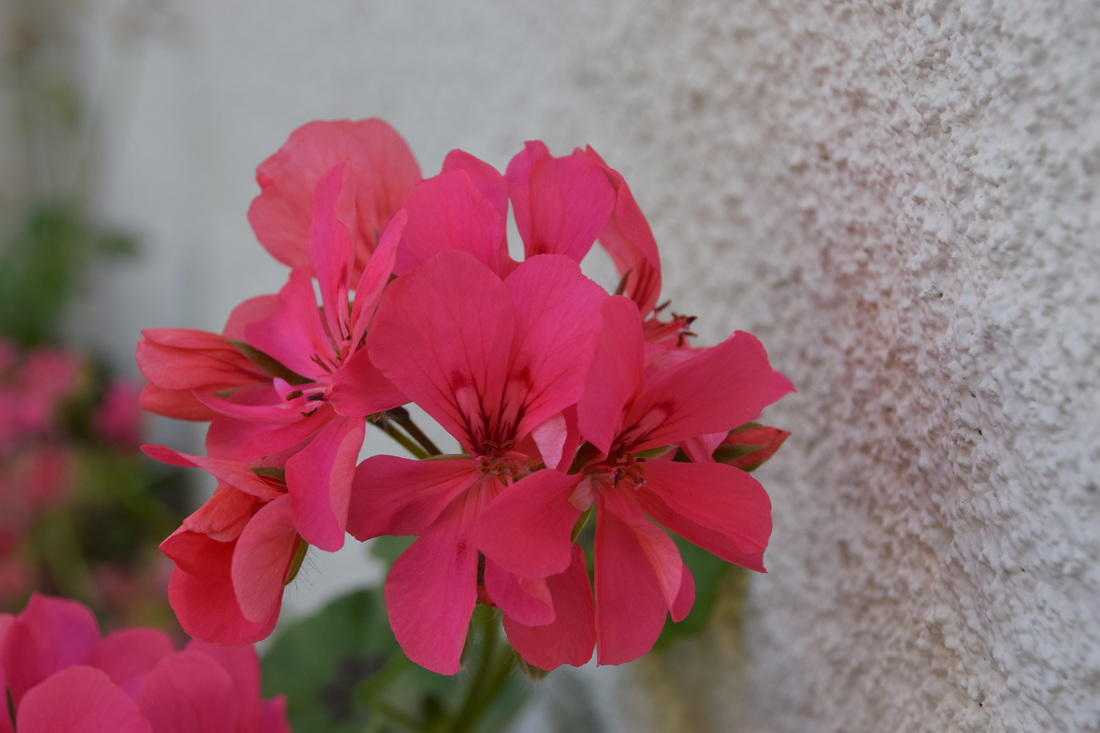
element: color ISO 400 aperture f/8 shutter speed 1/160
This photograph is a picture of a pot of flowers outside our weight room. The element of this picture is color. You can see the pink stands out since there is a white wall and it makes the color of the flower pop more and catch your eye. This picture is successful because I got pretty close to this picture, also zoomed in if I needed it, and it came out perfect and a great example.
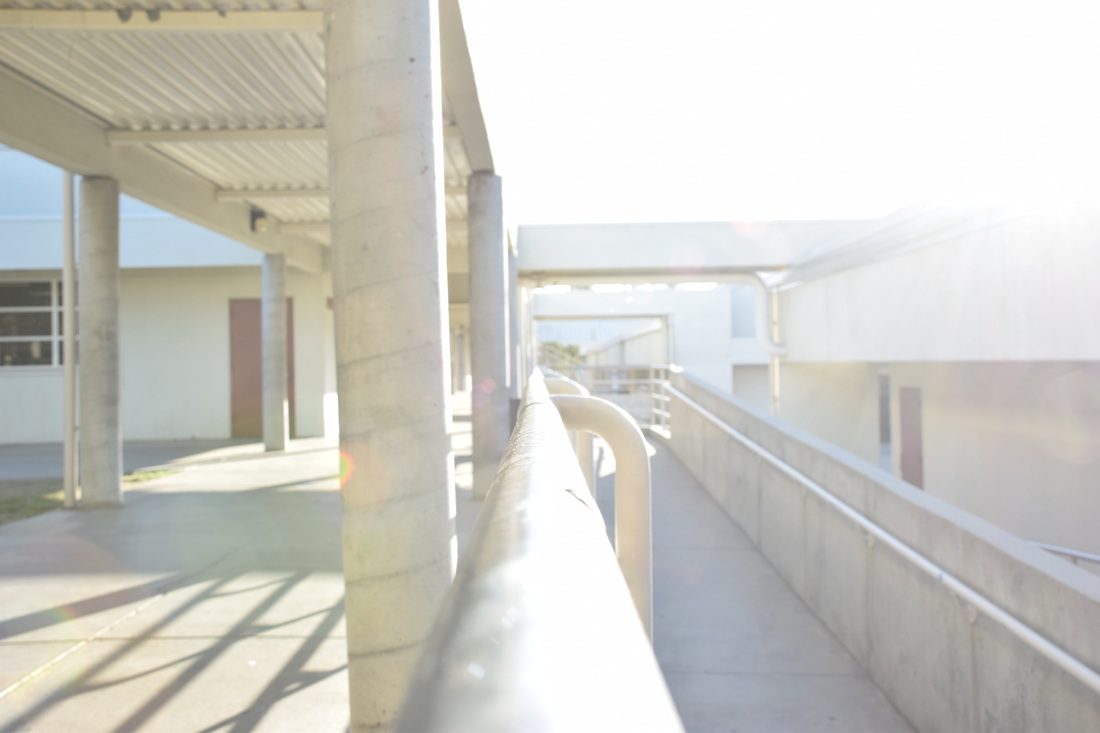
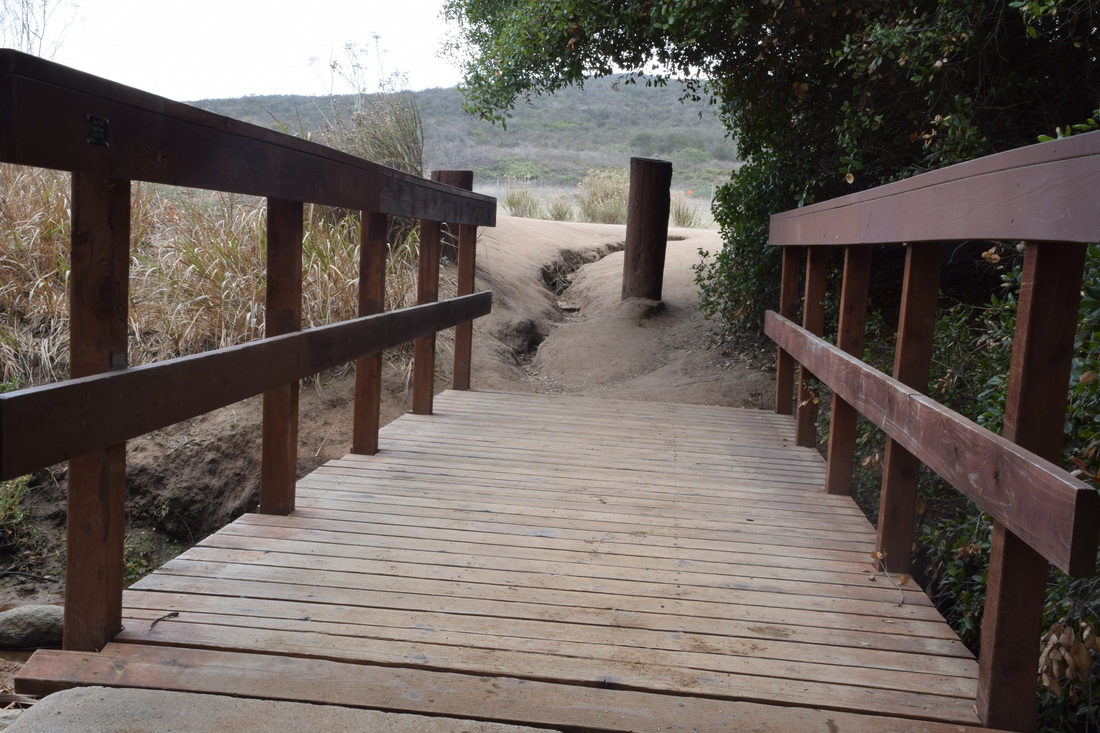
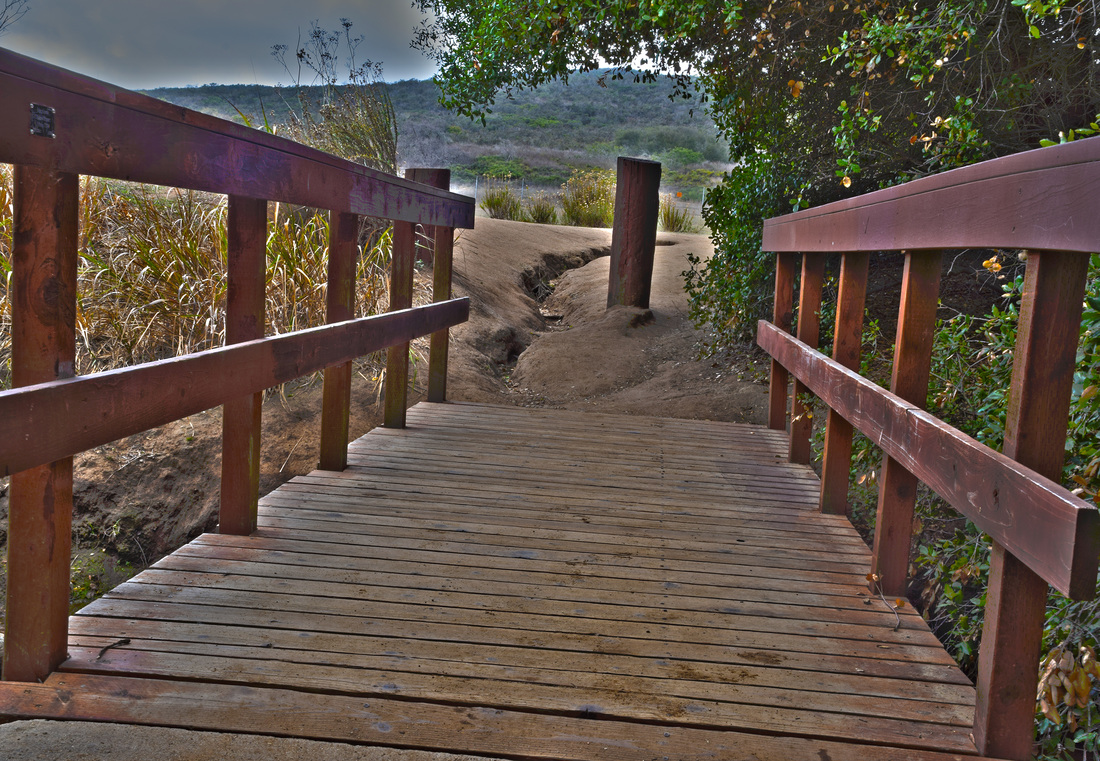
element: line ISO 400 aperture f/8 shutter speed 1/160
This photograph is of a railing at my school. The element of this picture is the main focus, which is line. But off to the sides you can see more lines in this photograph. This picture is successful because I captured the image I was going for. It has great lighting and I put the camera on the pole to get it completely on the pole.
Elements of art and Principles of Photography
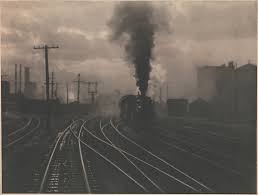
Alfred Steiglitz, 1902, http://www.metmuseum.org/art/collection/search/269461
Alfred Stieglitz
This is Alfred's photo of a train and some railroads. This is the element line because the railroads are leading your eyes all the way back into the picture making you think how far back they actually go. 
Sandy Skoglund 1981, a room surrounded by army men figures,http://sandyskoglund.com/pages/imagelist/1280_960/96_03/index.html
Sandy Skoglund
Sandy's picture obviously has two main colors. Her photo is element of color because it has two of the main colors you would need to be in this element. 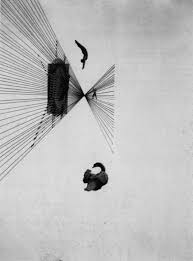
Laszio Moholy, 1925, http://www.theartstory.org/artist-moholy-nagy-laszlo.htm
Laszlo Moholy
His picture has two different triangles in his picture. To be in this element, you will need either one shape or more. 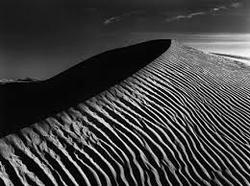 Ansel Adams, https://photographyicon.com/anseladams/ Ansel Adams, https://photographyicon.com/anseladams/
Ansel Adams
His picture is a picture of a hill of sand that can look three dimensional. To get this element you would need to have some type of form in the picture. 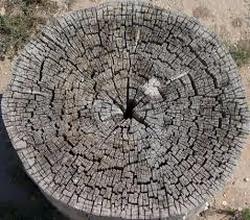 http://www.photoshoptextures.com/wood-textures/wood-textures.htm http://www.photoshoptextures.com/wood-textures/wood-textures.htm
For texture you would need any object, living or not, and get a very close picture of it and it gives you an idea of what it will feel like.
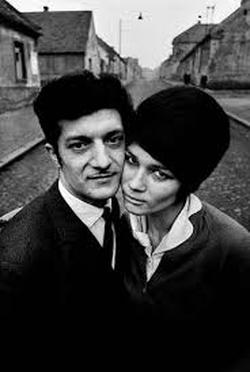 Josef Koudelka/Magnum Photos Czechoslovakia. Kladno. 1966 Josef Koudelka/Magnum Photos Czechoslovakia. Kladno. 1966
Josef Koudelka
His pictures give a nice feeling to them, and they have negative and positive space. 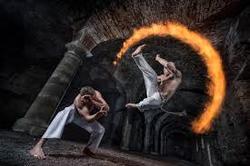 http://www.appliedartsmag.com/features_details.php?id=60§ion=1001 http://www.appliedartsmag.com/features_details.php?id=60§ion=1001
Ben Von Wong
His pictures have both darkness and lightness in them. And his element is value. 
Annie Leibovitz, Johnny Depp
Annie Leibovitz
Her element is balance. Balance is where you can take someone's face or a butterfly and make it symmetrical and it will sometimes become one but with opposite sides. 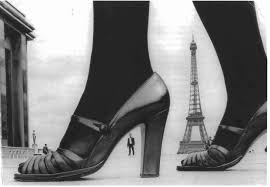
Diane Arbus, the Eiffel Tower
Diane Arbus
Her element is proportion and it's where you can take two objects, or human beings, and make one seem appear bigger by placing one in front or placing one in the back.  http://www.skylighters.org/photos/robertcapa.html http://www.skylighters.org/photos/robertcapa.html
Robert Capa
His photos are usually in very life risking places as you can see with this photo. His element is rhythm. 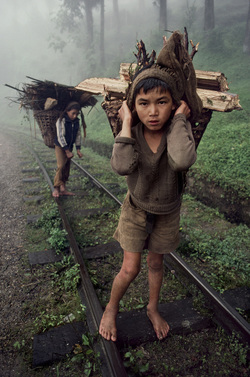 Steve McCurry, Bangladesh, 1983, BANGLADESH-10014. Young boys carry wood. Steve McCurry, Bangladesh, 1983, BANGLADESH-10014. Young boys carry wood.
Steve McCurry
His photos are very eye catching because he takes pictures that can be very special to some people. His element is emphasis. 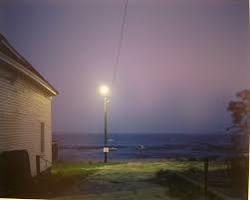 Joel Meyerowitz photography exhibition in Paris Joel Meyerowitz photography exhibition in Paris
Joel Meyerowitz
His pictures either capture two different colors into one or one color being both surfaces. His element is harmony.  William Wegman. 'Front-Facade' 1993 William Wegman. 'Front-Facade' 1993
William Wegman
His photos are obviously pictures of dogs doing human stuff. And they are variety because they are indeed individualism.  http://flyeschool.com/photographer/mary-ellen-mark http://flyeschool.com/photographer/mary-ellen-mark
Mary Ellen Mark
She brings variety and harmony together into one picture which is called unity. |
- The “building block” of design
- All good design will have one or more elements; line, color,shape, form, texture, space, and value - This presentation aims to show you some illustrations of these elements through photography. It could also be done through other art methods, such as painting, fashion, design,sculpture etc. Line (Alfred Steiglitz ) - A line is one dimensional. And can vary in width, direction, and length. Lines also can be defined the edges of a form. Lines can be horizontal, vertical or diagonal, straight, or curved, thick or thin. Lines lead your eye around the composition. Color (Sandy Skoglund) - Has three main characteristics; hue (red, yellow, green), value (how light or dark it is), and intensity (how bright or dull it is) colors can also be described as warm (red, yellow) or cool (blue, green) - Furthermore, monochromatic - one color plus tints (adding white) and shades (adding black) - Complimentary colors - colors opposites each other on the color wheel (ex. green and red) - Analogous colors - colors next to each other on the color wheel (ex. red and orange) Shape (Laszlo Moholy) - Shape is two dimensional, with height and width - Organic shape - a shape made by nature. Not completely defined. - Inorganic shape - manmade - such as rectangles and triangles. Form (Ansel Adams) - Form is three dimensional, has height and width and depth. - Photographers emphasize form by the use of highlights and shadows. Texture (Kelly Clark) - The surface quality of an object we sense through touch. All object have a physical texture (think - horse hair, dolphin - smooth) - In a two dimensional work, texture gives a visual sense of how an object depicted would feel in real life if were touched. Space (Josef Koudelka) - Real space is three dimensional. Space in a work of art refers to a feeling of depth or three dimensions. It can also refer to an artist’s use of the area around the picture plane. - Positive space - the space occupied by the primary object. - Negative space - the space around the primary object. Value (Ben Von Wong) - Value is the lightness or darkness of a surface. It is frequently used when talking about shading, but is also important in the study in the color. Principles of art - The principles of art are the rules or guidelines of art. - Used to organize or arrange the structural elements of design. - Principles are balance, proportion, rhythm, emphasis, harmony, variety, and unity. Balance (Annie Leibovitz) - Balance is similar to our physical sense of balance. It is how the artist uses opposing forces in a composition that results in a visual stability. - Most successful compositions achieve balance in one or two ways: symmetrically (the same on both sides, like a butterfly wing) or asymmetrically. Proportion (Diane Arbus) - Proportions relates to the relative size and scale of the various elements in a design. Specifically, the relationship between the objects. Rhythm (Robert Capa) - Rhythm in artwork indicates movement by the repetition of elements. Rhythm can make an artwork seem active Emphasis (Steve McCurry) - Emphasis is to make one part of an artwork dominate over the other parts. It attracts the viewer’s eyes to place a special of importance in an artwork. Harmony (Joel Meyerowitz) - Harmony is the pleasing quality achieved by different elements of a composing interacting to form a whole. Harmony is often accomplished through repetition of the same or similar characteristics. Variety (William Wegman) - Differences achieved by opposing, contrasting, changing, elaborating, or diversifying elements in a composition to add individualism and interest. Unity (Mary Ellen Mark) - Unity is the result of bringing the elements of art into the appropriate ratio between harmony and variety to achieve a sense of oneness. It is sense that everything works together and looks like it fits. |
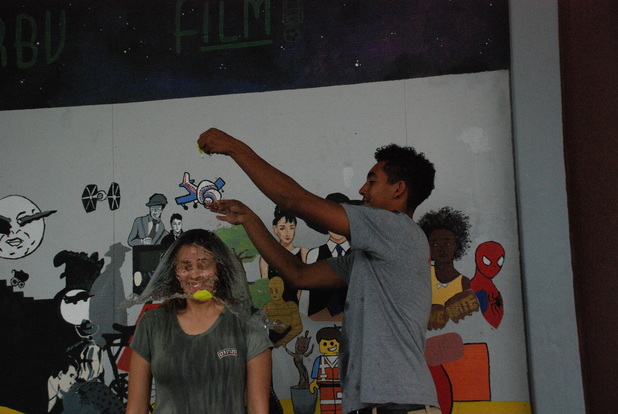
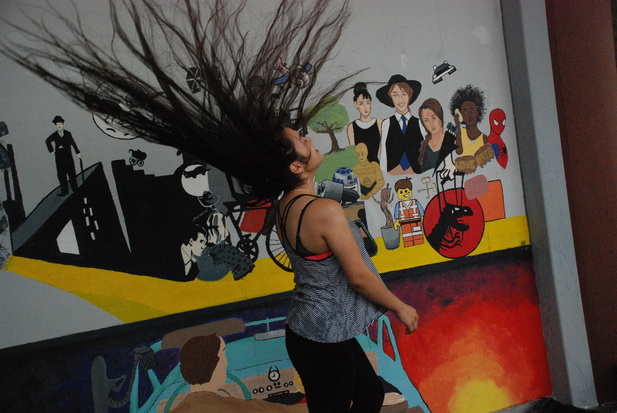
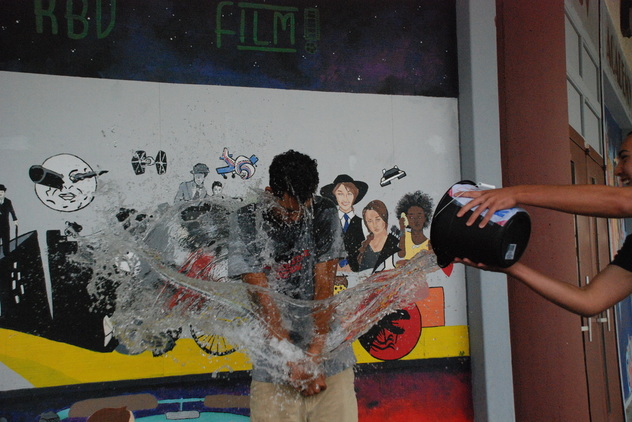
~Fast Shutter Speed~
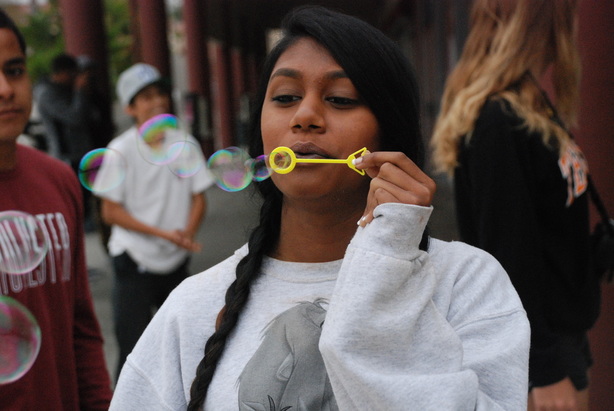
ISO 1600 aperture f/5 shutter speed 1/350
How I took this photograph was taken with bubbles and I had my partner blow bubbles and I brightened the picture on iPhoto. Where I took these photos were in the quad of my school. We were in front of some murals we have. The struggles with fast shutter speed were in some areas, the pictures that I didn't upload, came out pretty dark. What I learned about fast shutter speed was it captures the picture so quickly, the pictures came out very amazing and I'm pretty shocked that even with movement, they came out clear. You can use fast shutter speed for cars on a highway, fairground rides, watching wild animals run maybe when you're on vacation, waves, sea animals like whale or dolphins jumping out of the water. you can use it for anything with movement.
ISO 1600 aperture f/4 shutter speed 1/350
ISO 2000 aperture f/3.5 shutter speed 1/750

ISO 2000 f/4.5 1/750
ISO 2000 aperture f/8 shutter speed 1/750
ISO 2000 aperture f/4.2 shutter speed 1/750
ISO 2000 aperture f/3.8 shutter speed 1/750
ISO 2000 aperture f/4.2 shutter speed 1/750
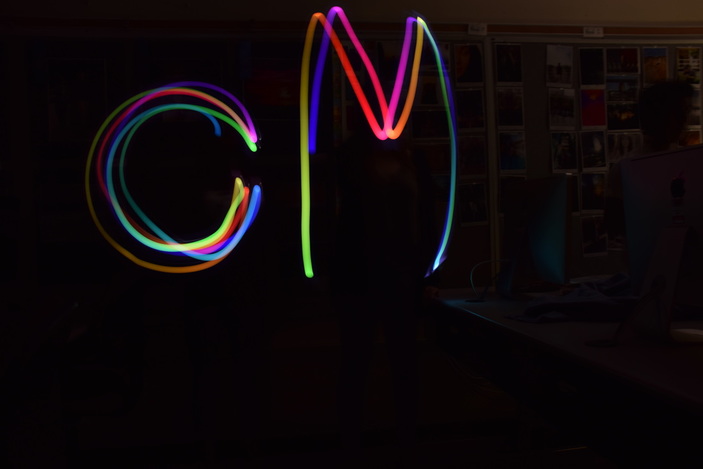
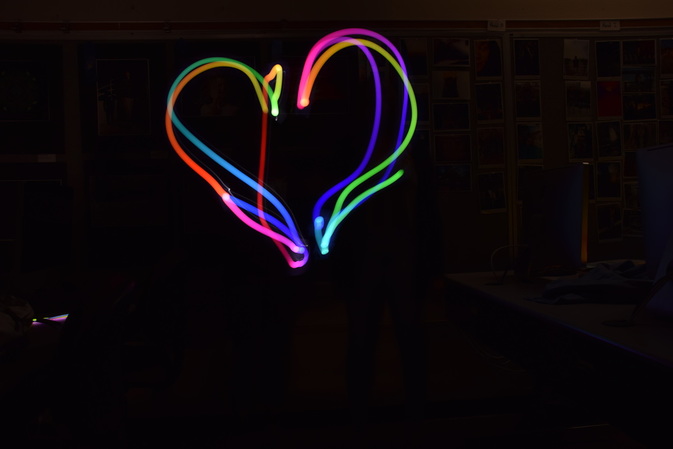
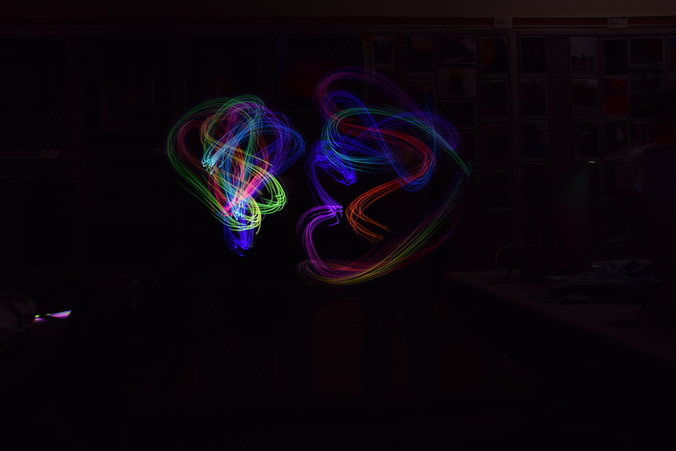
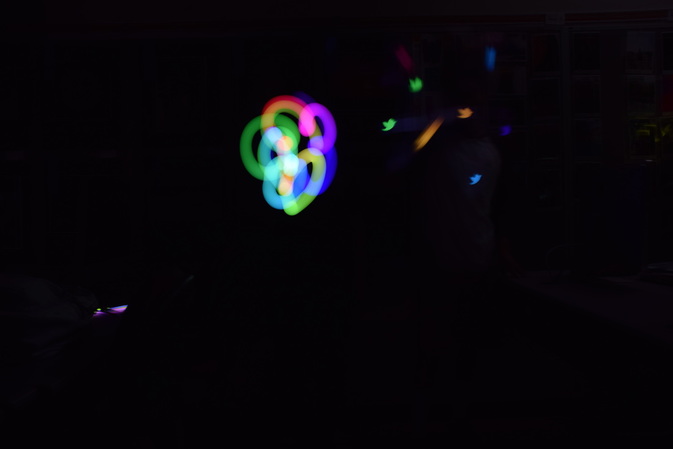
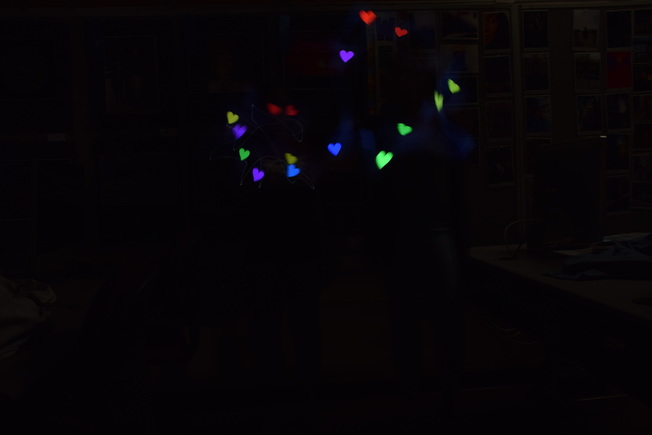
~Light Painting~
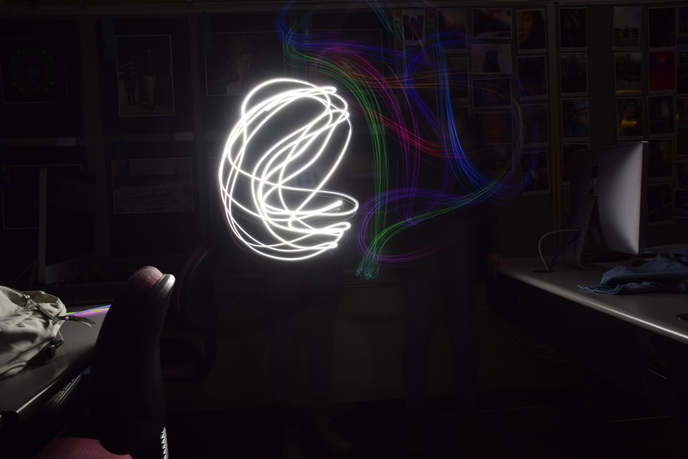
ISO 100 aperture f/5.6 shutter speed 8.0
With these photos I took in a dark room on a tripod. I had my partners use an app called MyLightPaint (IPhones only) and i had my partners do different effects. My other partner used the same effect, the hearts. I had no struggles with the camera/project. I learned that if you want to use this setting in the camera, you have to do a lot of things to get the right one. In a picture or two, we used the flash for some light and to do the same thing as what the app was doing.
ISO 100 aperture f/5.6 shutter speed 8.0
ISO 100 aperture f/5.6 shutter speed 8.0
ISO 100 aperture f/5.6 shutter speed 8.0
ISO 100 aperture f/5.6 shutter speed 8.0
ISO 200 aperture f/5.6 shutter speed 8.0
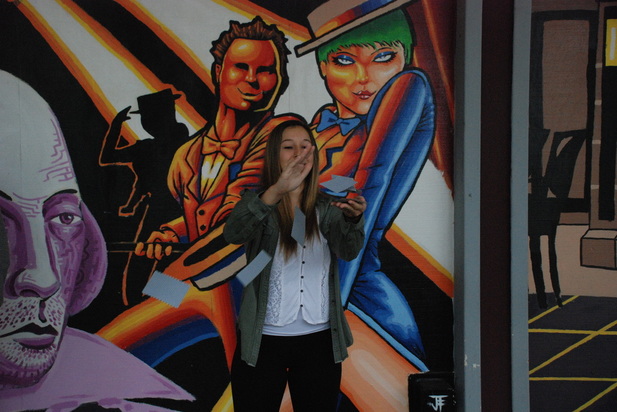
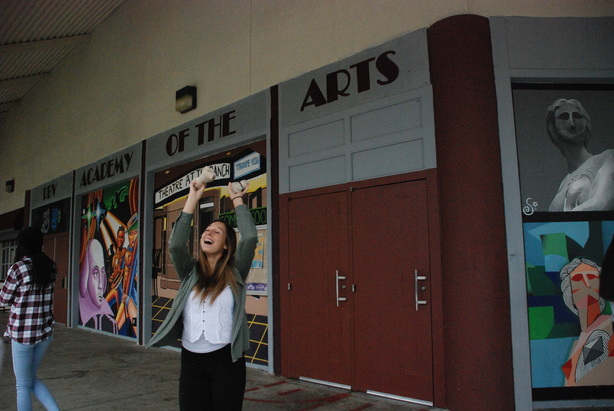
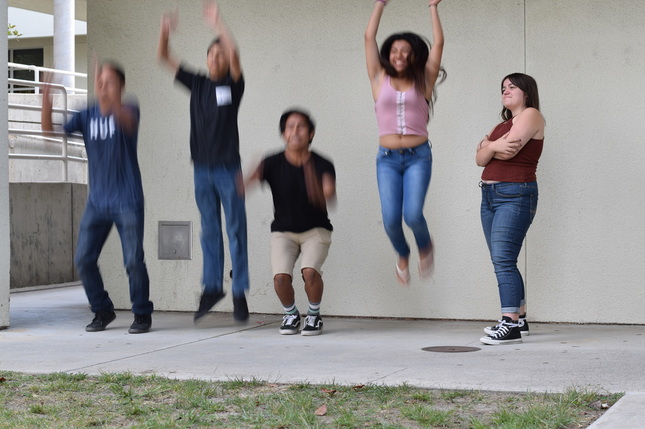
Shutter Speed - Silly Class photos
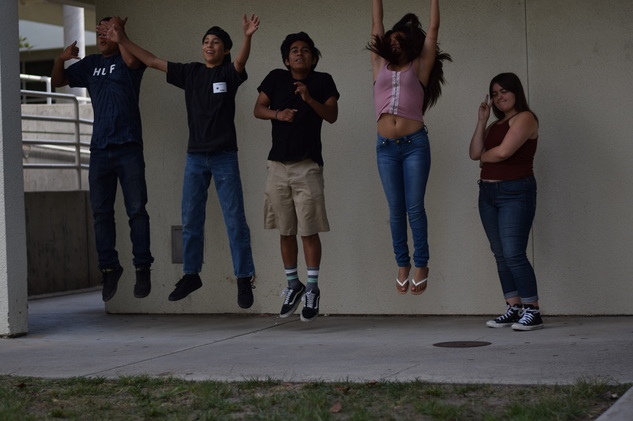
shutter speed 1/100 ISO 100 aperture f/1.8
With these photos, we played around with shutter speed. And the setting i have on the camera was S for shutter speed. I would use this affect for a beautiful sunset with some movement.
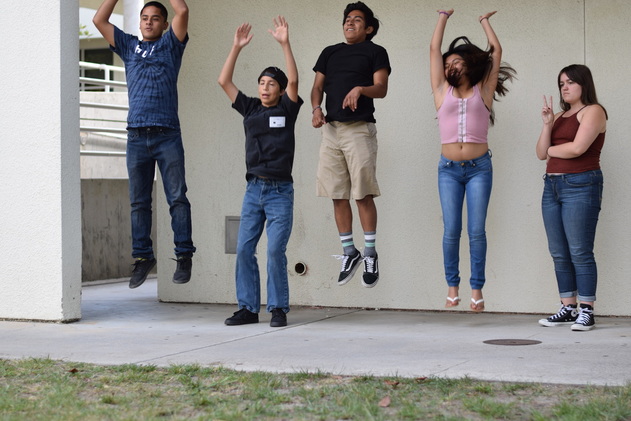
shutter speed 1/250 ISO 100 aperture f/2.2
This picture gives you a very clear photo of everyone. It shows that everyone in the picture, besides two people are like floating in the air. i would use this for getting something moving but not too fast, like a carnival ride. This is on S as well.
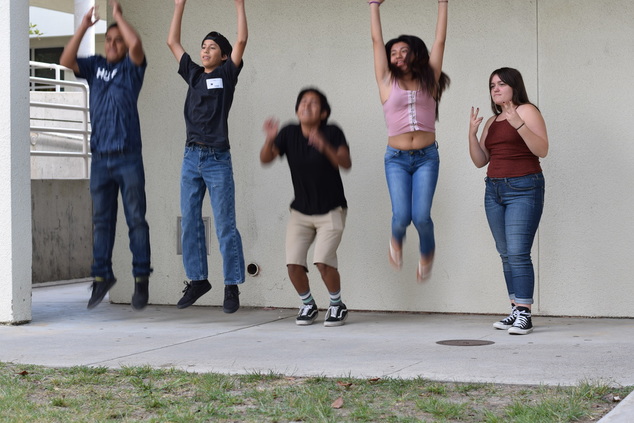
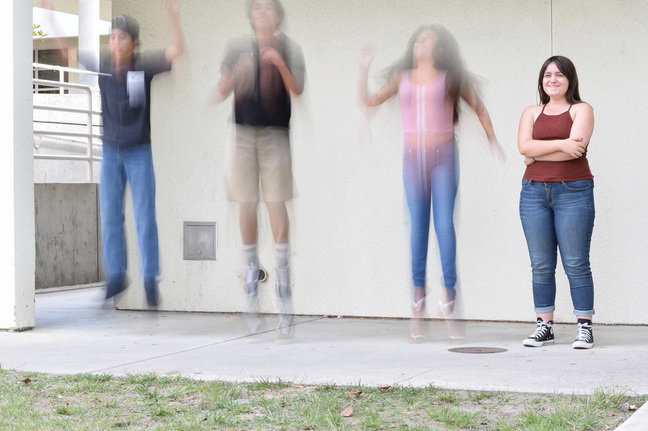
shutter speed 1/60 ISO 100 aperture f/4.5
This photo has the same tone as the same tone as the last, but more depth to it. All these photos are going to be on the S. I would use this effect to get someone or more people walking in front of a mural in the city. So you can get a beautiful mural with the story of a random person walking in front of it so it looks like it was made to look like that.
shutter speed 1/30 ISO 100 aperture f/6.3
This picture is like the first but it lets you a more clear effect and have that blur effect. But this one is better because its not so ghost like. I would use this effect if you want to get a more softer ghost effect. I had this on the S still on the camera.
shutter speed 1/3 ISO 100 aperture f/16
This picture shows the shutter speed was giving a more ghost like effect. To change the shutter speed priority i changed it to S. You can use this effect on moving cars to get that ring of light you see in multiple pictures, you can use this effect on the ocean to give a spooky effect and have it have a silky tone.
Cyanotype Notes
-John Herschel discovered it in (1792 – 1871)
-John Herschel invented it, he could of been the one to invent photography if he wanted to.
-Sir John heard of the process and later he invented cyanotype.
-Ana, the daughter of a friend of Hersal, put out a book and that was the first known photography.
-When a photo would turn blue they would put it in some water and let it set for three-ish minutes and take them out.
Daguerrotype notes
-Louis Daguerre invented the daguerreotype and it was discovered in 1839.
-With this invention, you would be able to know what your grandparents would look like even if they die before you were born.
-Back then, to get an image of yourself of another person, there would only be the time it takes for drawing or painting
-In 1815 and 1816 an important man who found that asphalt was fragile to sunlight and that would help create an image.
-A daguerreotype is both positive and negative image. you have to be holding the image.
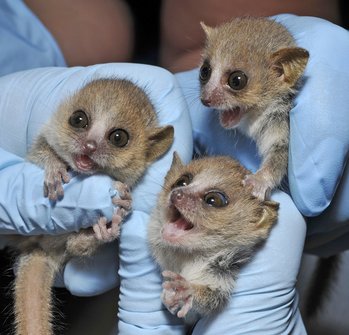
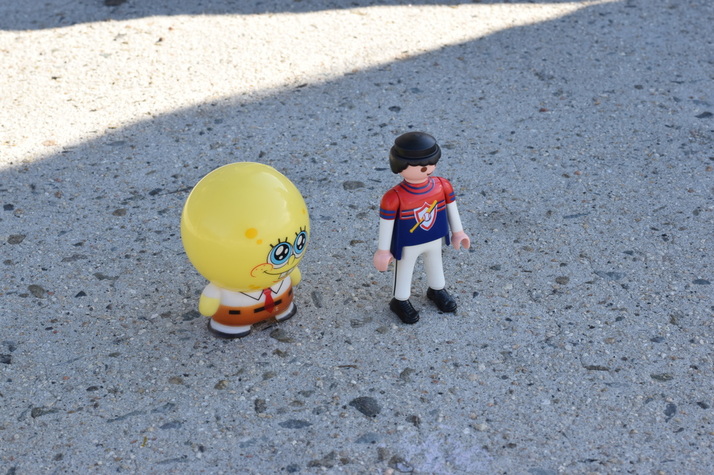
Toy Story - A Trip to the Zoo
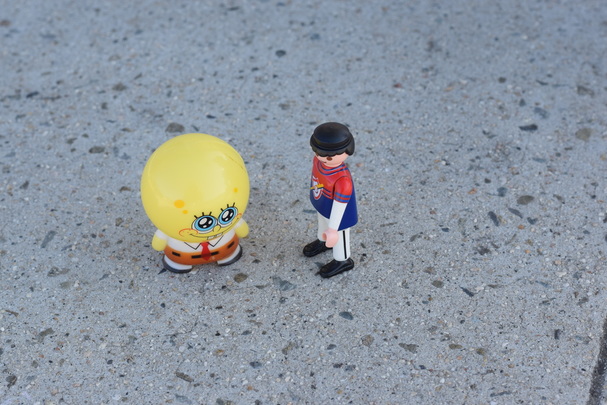
aperture f/8 ISO 200 shutter speed 1/200
Spongebob and Carl, the baseball player, decided to to visit the Zoo before Carl's big baseball game later that day. They were talking about what animals they were excited to see, what foods they were dying to eat, or even try new foods. Spongebob was excited to see the sea animals because he loves the ocean. Carl wanted to see the rare wild animals run freely in their huge cages.
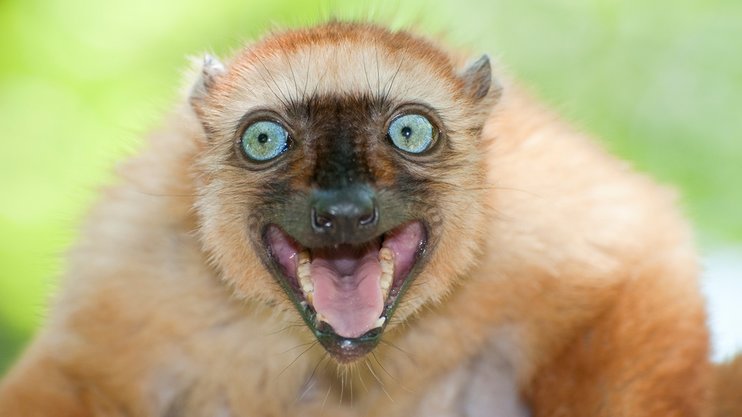
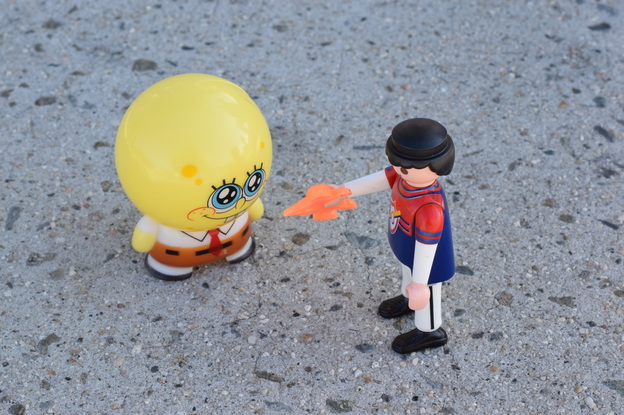
Lizards and Clowns
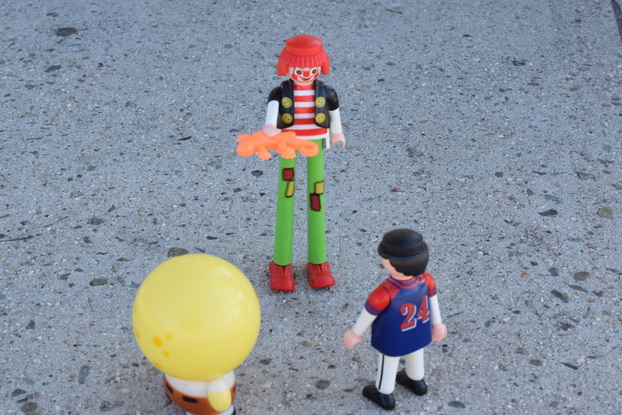
aperture f/16 ISO 200 shutter speed 1/50
When Spongebob and Carl finished looking at some of the wild animals, they come across a clown, named Ben, holding a lizard. They thought it was the most interesting thing ever. They've never seen an orange lizard in their lives. They stopped and asked Ben some questions about lizards and why he was holding an orange one in the middle of the Zoo. Ben clearly explained why he was, and they all talked for about a good 30 minutes.
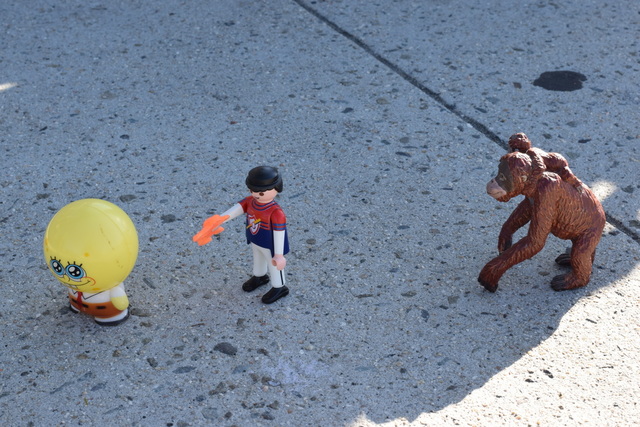
Lost and Confused
aperture f/16 ISO 200 shutter speed 1/50
When they thought Ben was a cool clown, ben basically threw the lizard towards them and ran off out of nowhere. They looked and looked and tried to see if anyone was looking for him, like the cops. But no one was around and they went on with their day with the abandoned lizard. They were heading towards the sea creatures, for Spongebob, they almost forgot about the lizard and they asked each other where they could think where Ben went but they sort of just shrugged their shoulders and looked at all the tanks and information about the ocean.
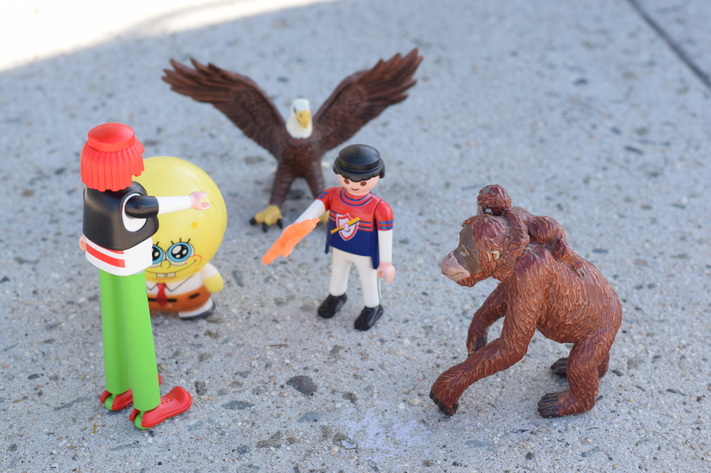
Uh Oh ..
aperture f/16 ISO 200 shutter speed 1/80
When they were walking out of the exhibit, they heard heavy footsteps coming closer and closer. They looked back and about wet themselves because a huge gorilla with her baby on her back was running towards them with an angry tone. Spongebob screamed and started running and Carl froze not knowing what to do and Spongebob pulled Carl by a small piece of him and Carl wasn't paying attention so he was being dragged with the small lizard still in his little hands.
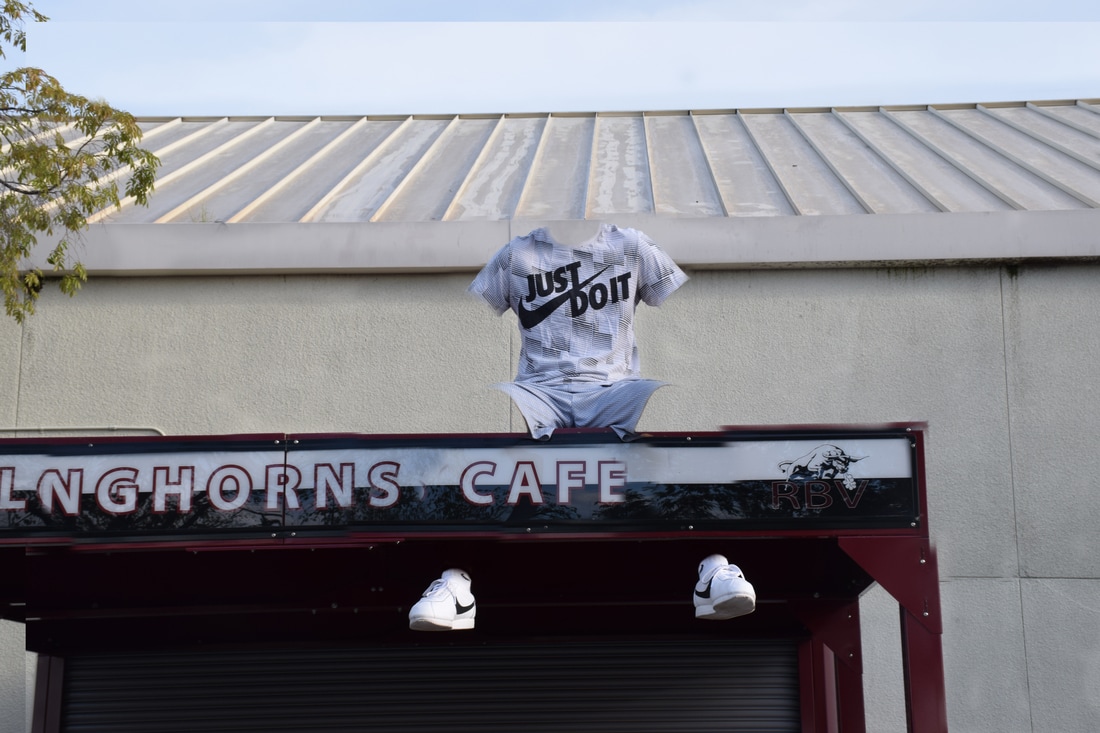
Here Comes More Trouble
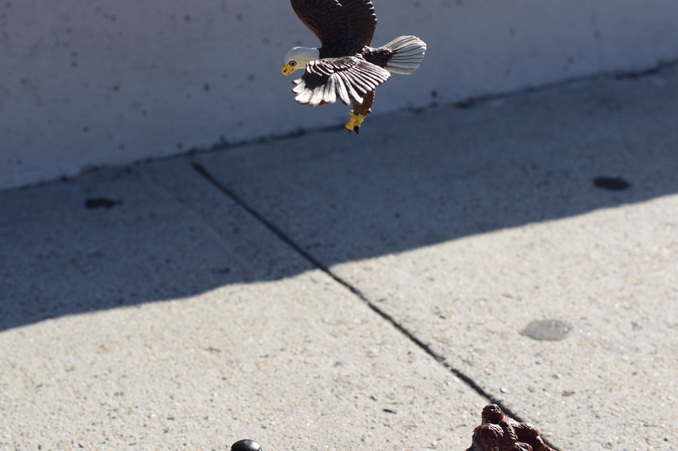
aperture f/8 ISO 200 shutter speed 1/800
When the boys thought they were almost out of the gorillas sight, an eagle flew above them almost getting the lizard. Carl was still being dragged and he was yelling at Spongebob to run faster but Spongebob yelled back he has small legs and he can't go very fast. Spongebob then soon pulled them into a random gift shop hoping to lose the gorilla. They saw her run past the store, as Spongebob catch his breath and carl looking out and the eagle found them and Spongebob and Carl ran out trying to find ben.
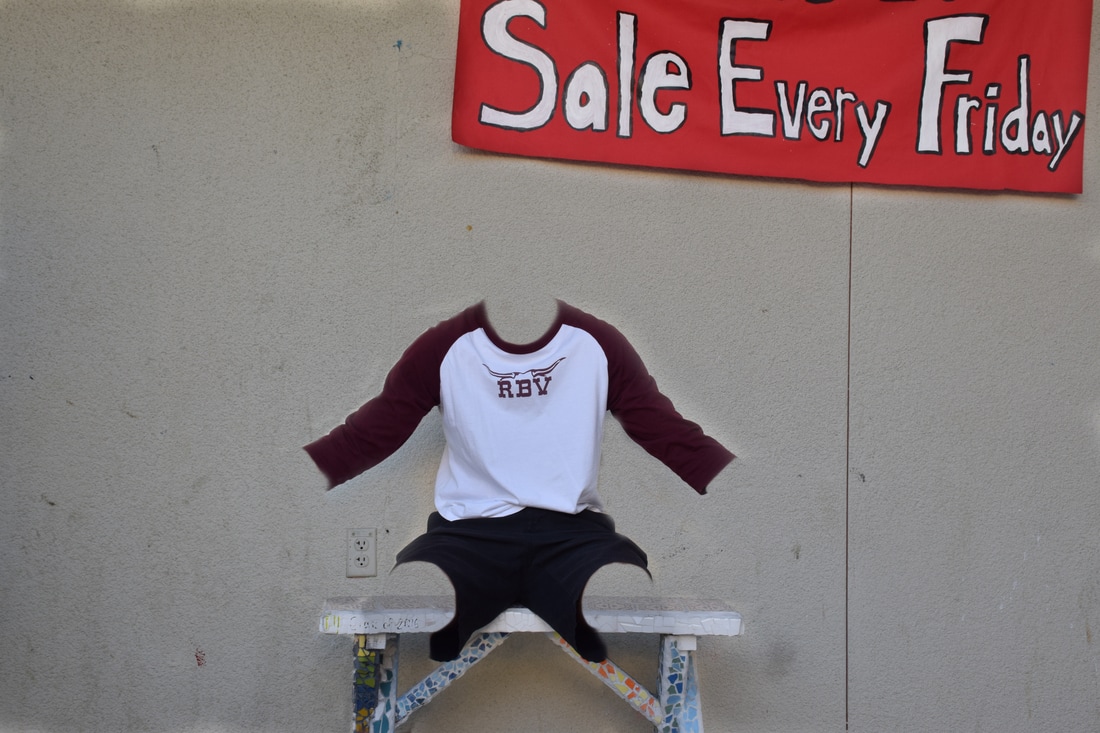
Candy Lizard???
aperture f/8 ISO 200 shutter speed 1/50
Finally Spongebob and Carl found Ben and handed him back the lizard and was asking him where he was all day and Ben said he was at the bathroom and was looking for them all day and they explained how the gorilla and the eagle was chasing them and trying to get the lizard. Ben laughed and they all looked at him with confusion and Ben takes the lizard and takes a bite out of it and tells them its candy. They later felt stupid for worrying about a candy lizard and the animals went back to their cages and slept.
Game Time
aperture f/8 ISO 200 shutter speed 1/250
Carl and Spongebob wasn't watching the time, and they only had an hour to get to Carl's game. They rushed out of the Zoo and they laughed because they still couldn't believe that the lizard was candy and they were worried that the animals were going to eat him. They agreed that they will probably never go to the Zoo again and stick to wild animal planet to see sea creatures and wild animals without being chased by them.
Aperture Priority
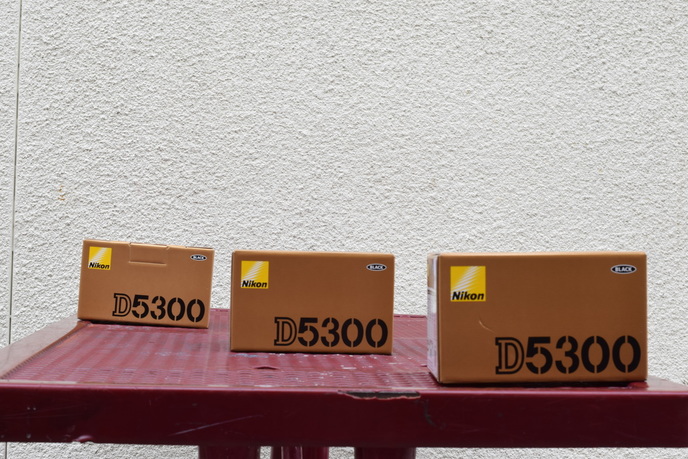
ISO of 200 aperture f/16 shutter speed 1/640
This photo is the highest aperture and as you may tell, the last box is the main focus point. You can also see the details of the table and even though the last box is focused, the table is also and the other boxes are blurred.
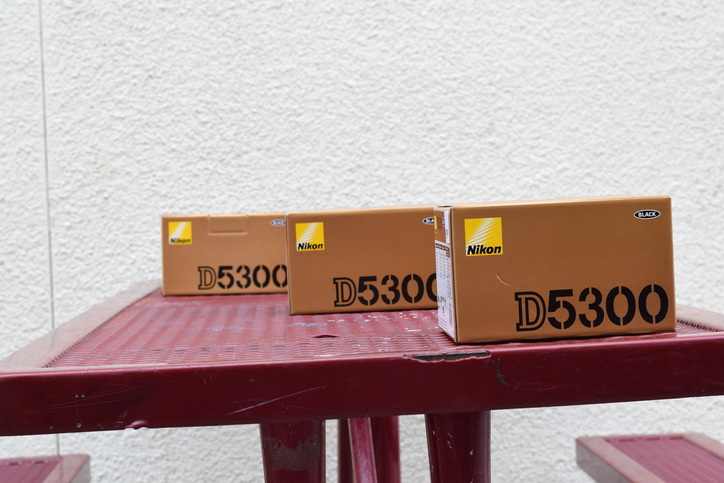
ISO is 200 aperture f/8 shutter speed 1/640
In this photo the middle box is focused and the two others are blurred out. The idea of this photo is to tell which one you can focus on with out having them all focus and have a main point.
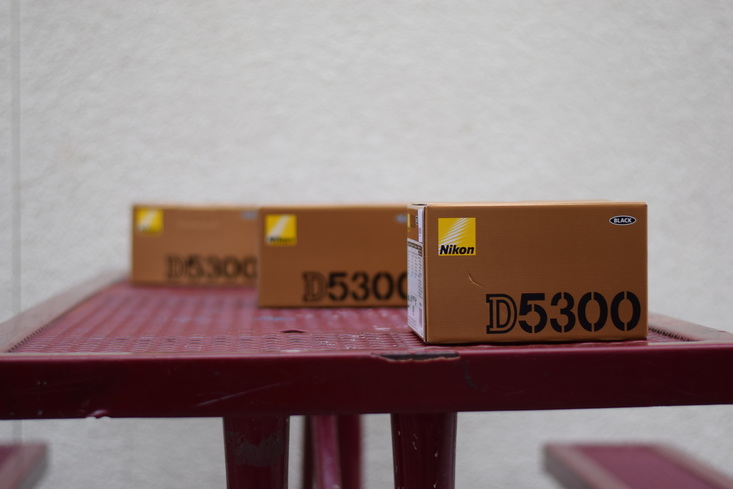
ISO is 200 aperture f/1.8 shutter speed 1/640
This photo shows that the first box is focused but the others aren't because the camera was only focused on that one box. in my other photos you will be able to point out the main box.
Photography Notes
Digital camera notes
-DSLR stands for “digital single lens reflex” it uses a mirror to direct light from the lens to the viewfinder, which is a hole on the back of the camera that you look through to see what youre taking a picture of.
Exposure
-The amount of light that is collected by the sensor of the camera during a single picture.
-If the shot is exposed too long the picture will be washed out
-If the photo is exposed too short the picture will be too dark
-Almost all cameras today have light meters which measure the light in the given shot and set an ideal exposure
-Top three : aperture, shutter speed, iso
Before taking a picture
-Aperture
-Shutter speed
-ISO
Aperture about a camera
-Simply put, aperture is a hole within the lens, through which light travels into the camera body
-It is easier to understand the concept if you just think about your eyes. Cameras are like the human eyes
Large vs Small aperture
-F-numbers (for example f/5.6) it is a way of describing the size of the aperture or how open or closed it is
-A smaller f-stop means a smaller aperture (for example f/1.4 is larger than f/2.0 and much larger than f/8.0)
Aperture basics
-Small apertures (high f/numbers ie f/22) increase the depth of field, bringing both the main subject and background into focus
-Large apertures (low f/numbers ie f/2.8) soften background details
-Depth of field to which objects behind and in front of the focal point appear in focus
Shutter Speed
-Also known as “exposure time” stands for the length of a time a camera shutter is open to expose light into the camera sensor
-It can freeze time and stop action completely
-If the shutter speed is slow the effect can be called “motion blur”
-Shutter speed are typically measured in fractions of a second when they are under a second
-¼ means the quarter of a second while ⅕ means one.
Rule of thumb for shutter speed
-The slowest shutter speed for hand-held photography is 1/60. Anything lower than then that shoulder be either be on a tripod or on a solid surface. Anything slower begins to get motion blur.
ISO
-ISo is the level of sensitivity of your camera to available light
The lower the ISO number, the less sensitive it is to the light, while higher ISO number increases the sensitivity of your camera
-The component with your camera that can change sensitivity is called “image sensor” or just “sensor”
General rule of thumb
-Bright and sunny, 100 iso
-Cloudy, 250 iso
-Indoors, 500 iso
-Night time without a flash, 1600 iso
Modes on the DSLR
-M - manual control over aperture and shutter
-A - aperture priority
-S - shutter priority
-P - camera sets shutter speed and aperture
How to hold a DSLR
-Have the camera strap around your neck at all times and hold the camera by the lens and hand grip if possible
Camera Obscura

A camera obscure is when you are in a dark room and poke a hole somewhere in the lens. that hole will then be projected upside-down on a wall. sometimes people poke holes in the lens to project more light. There was a chalk form where it darkened when the sun hit it to make an image. Sir Humpry davy told people about his friends art work and then it became even more popular.
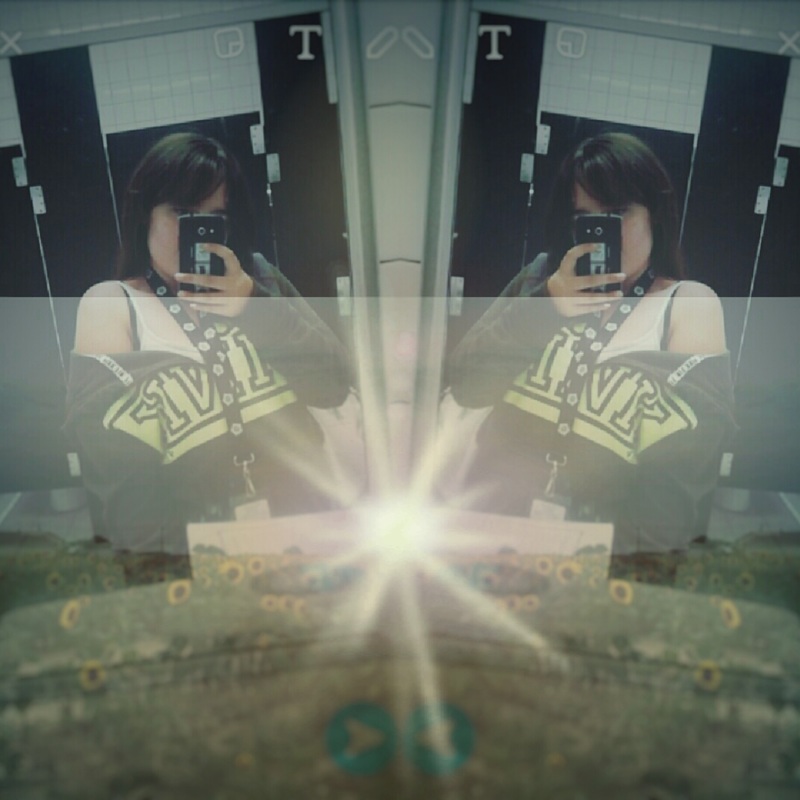
Surrealistic Selfie
This is my surrealistic selfie, I chose this photo because it represents my love for sunflowers. Sunflowers inspire me because they remind me to be happy. I feel like everytime I see a sunflower or many more, they bring me a positive vibe because of their colors. The apps I used to mirror this image of myself, was lidow, and i used that same app to make the sun effect. I also used pixlr to get the double exposure of the sunflowers on top and I blurred them out to get the focus point on myself. For the lighting i used the setting vintage.
